
6 practical examples on how to use macros
November 20, 2020
5 min read

4D 18 R5 introduced form macros. They can be incredibly useful, for example, by providing an ideal way to save time on repetitive tasks. In this blog post, we’ll show you some basic examples to learn more about how macros work and the possibilities they offer. All of the following examples are available on GitHub.
This is a macro to set the font color to red for all selected form objects.
In the FormMacros.json file, I declare my macro:
{
   "macros": {
      "Set Red": {
         "class": "SetRedColor"
      }
}
I create a class and with the “currentSelection” property, I retrieve the collection of selected form objects. Then I change the property of the form object. Finally, I return the attribute “currentPage” which contains the modifications to inform 4D.
The code:
Function onInvoke($editor : Object) : Object

 var $name : Text

 If ($editor.editor.currentSelection.length>0)

 // Set stroke to red for each selected objects

  For each ($name;$editor.editor.currentSelection)

   $editor.editor.currentPage.objects[$name].stroke:="red"

  End for each

 Else

  ALERT("Please, select a form object.")

 End if

 // Notify to 4D the modification

 $0:=New object("currentPage";$editor.editor.currentPage)
The “SetRedColor” class contains the code of the macro, it’s available in the “HDI_FormMacro” component on GitHub.
Some texts should be in red, others in green. I could create two macros with their own associated classes, or I can create two macros with parameters such as color, and associate them to the same class.
In the FormMacros.json file, I declare two macros that use the same class and the color parameter:
{
   "macros": {
      "Set Font Color to Red": {
         "class": "SetFontColor",
         "color": "red"
      },
      "Set Font Color to Green": {
         "class": "SetFontColor",
         "color": "green"
      },
}
In the class constructor, I retrieve the color parameter:
Class constructor

 var $1 : Object

 This.color:=$1.color
In the onInvoke function, I can use the same code as Example 1. The only difference is instead of using the string “red”, we use the variable “This.color“.
The “SetFontColor” class contains the code of the macro, it’s available in the “HDI_FormMacro” component on GitHub.
With a macro, you can also add form objects to the form with a method. There are several ways to associate or add a method. I recommend that you read this page of the documentation which explains all of the possibilities.
In this example, only the method’s line of code is given to 4D. When executing, 4D will create and name the corresponding method file.
Function onInvoke($editor : Object)->$result : Object

 var $btnHello : Object


 // Create a "Hello" button

 $btnHello:=New object("type";"button";\

  "text";"Hello World!";\

  "method";New object("source";"ALERT(\"coucou\")");\

  "events";New collection("onClick");\

  "width";120;\

  "height";20;\

  "top";0;\

  "left";0)


 // Add button in the current page

 $editor.editor.currentPage.objects.btnHello:=$btnHello

 // Select the new button in the form editor

 $editor.editor.currentSelection.clear()

 $editor.editor.currentSelection.push("btnHello")


 // Notify 4D of the modification

 $result:=New object

 $result.currentSelection:=$editor.editor.currentSelection

 $result.currentPage:=$editor.editor.currentPage
To easily position the form object in the form and modify other properties (if needed), I select the form object with a simple clear() and push() on the “currentSelection“, without forgetting to return “currentSelection” to notify 4D about the modifications.
The “AddButton” class contains the code of the macro, it’s available in the “HDI_FormMacro” component on GitHub.
You can also write macros that don’t modify the form. Instead, these macros allow you to validate information, attributes, or properties in your form. For example, validating the image paths of your multi-page form.
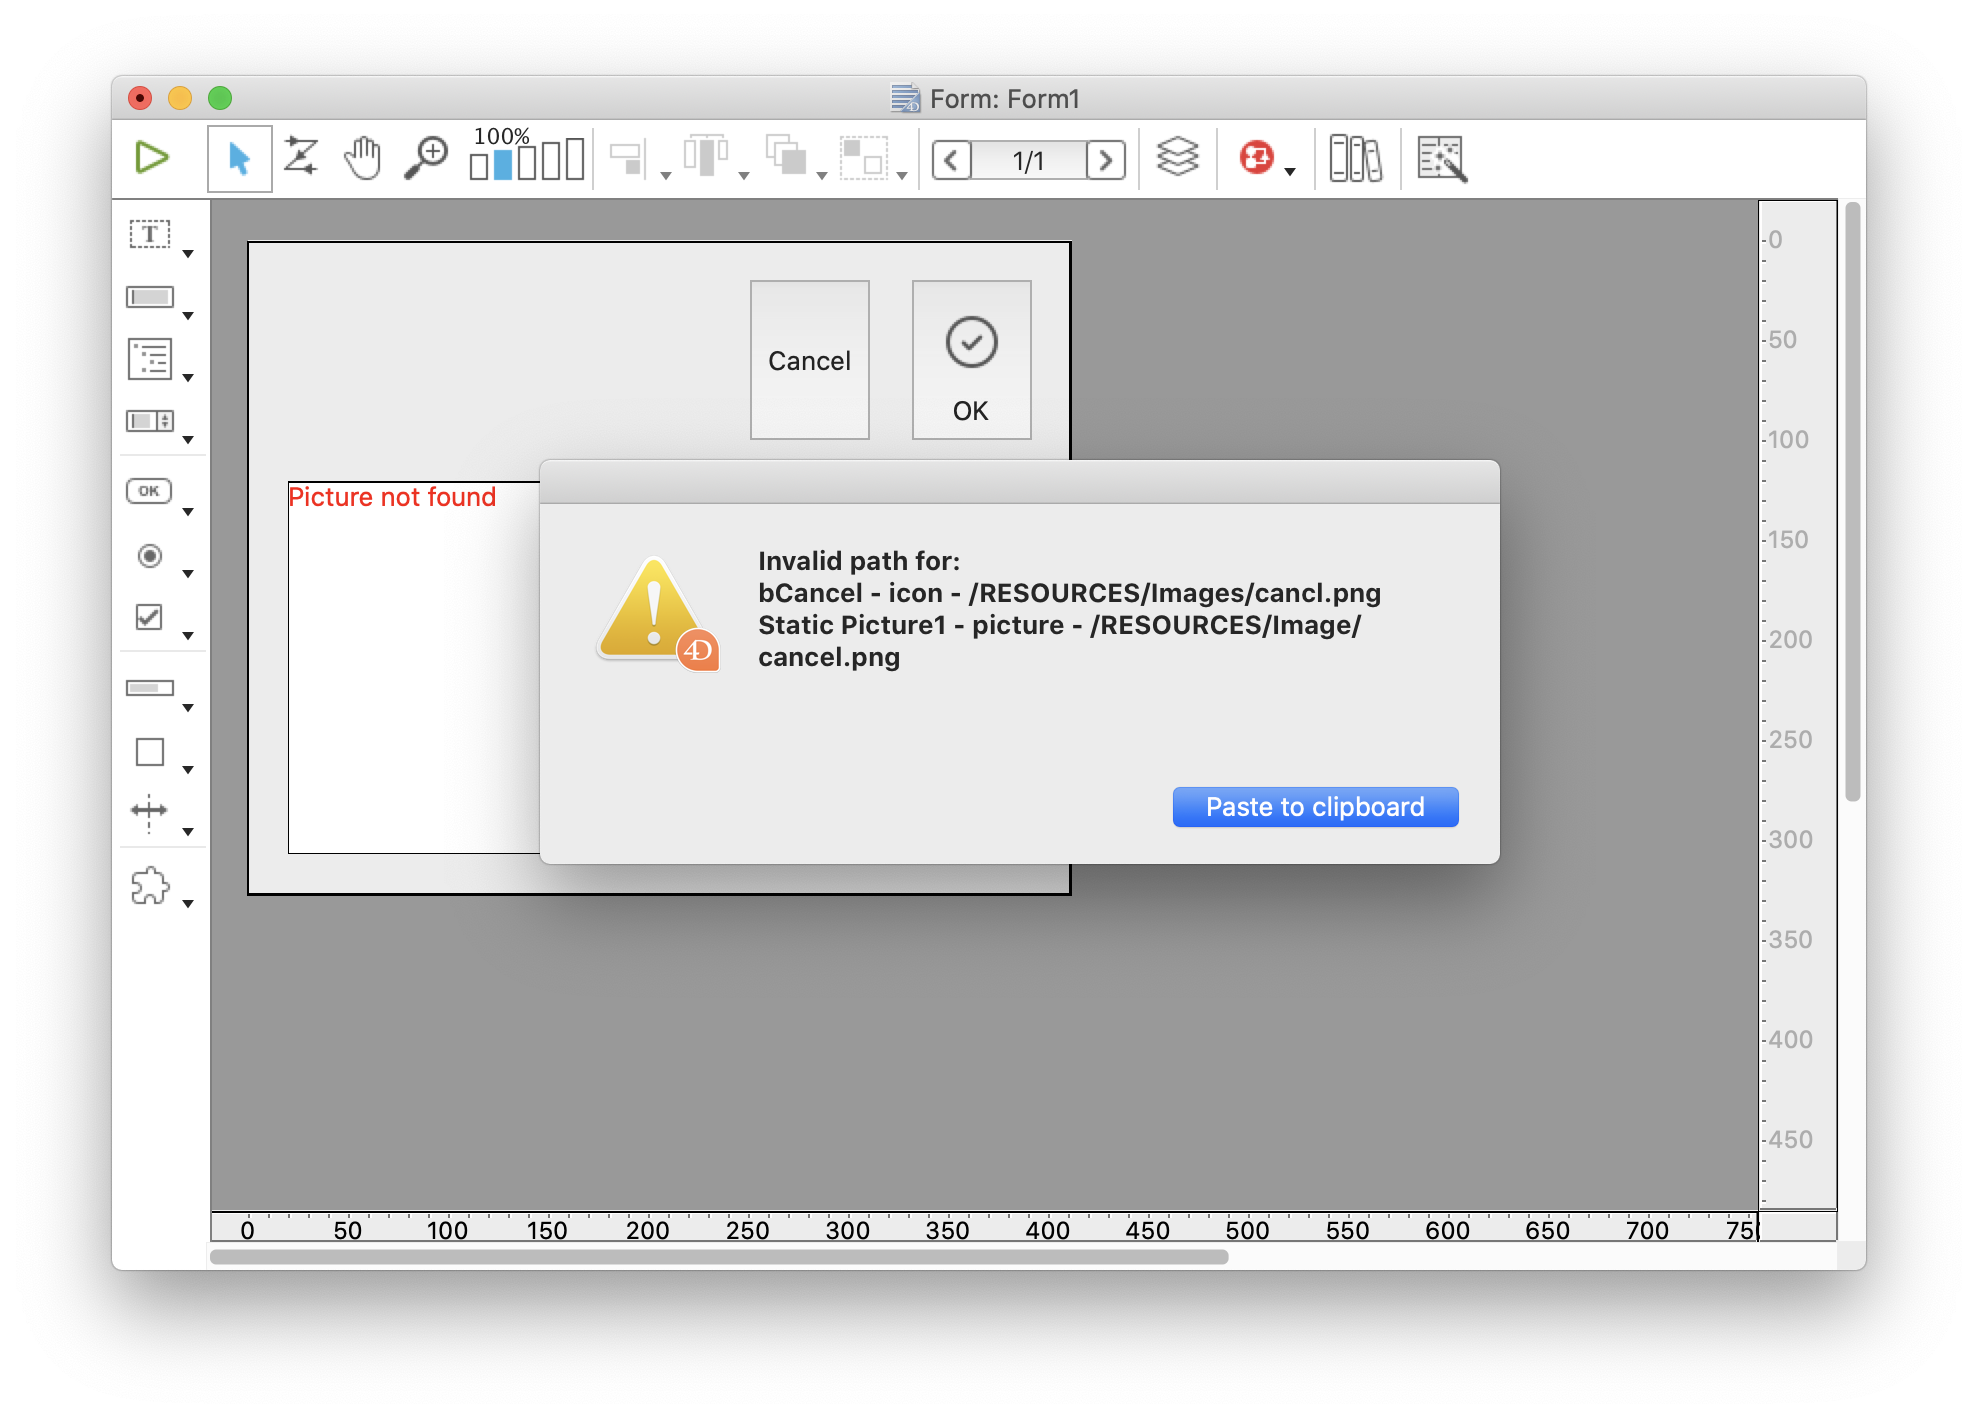
The “CheckImagePath” class contains the code of the macro, it’s available in the “HDI_FormMacro” component on GitHub.
A macro can also display a modal dialog. For example, to display the list of objects of the current page with their type, name, and CSS class, or any other parameter you want. When the developer clicks on the Select button in the dialog, the selected objects are also selected in the form editor.
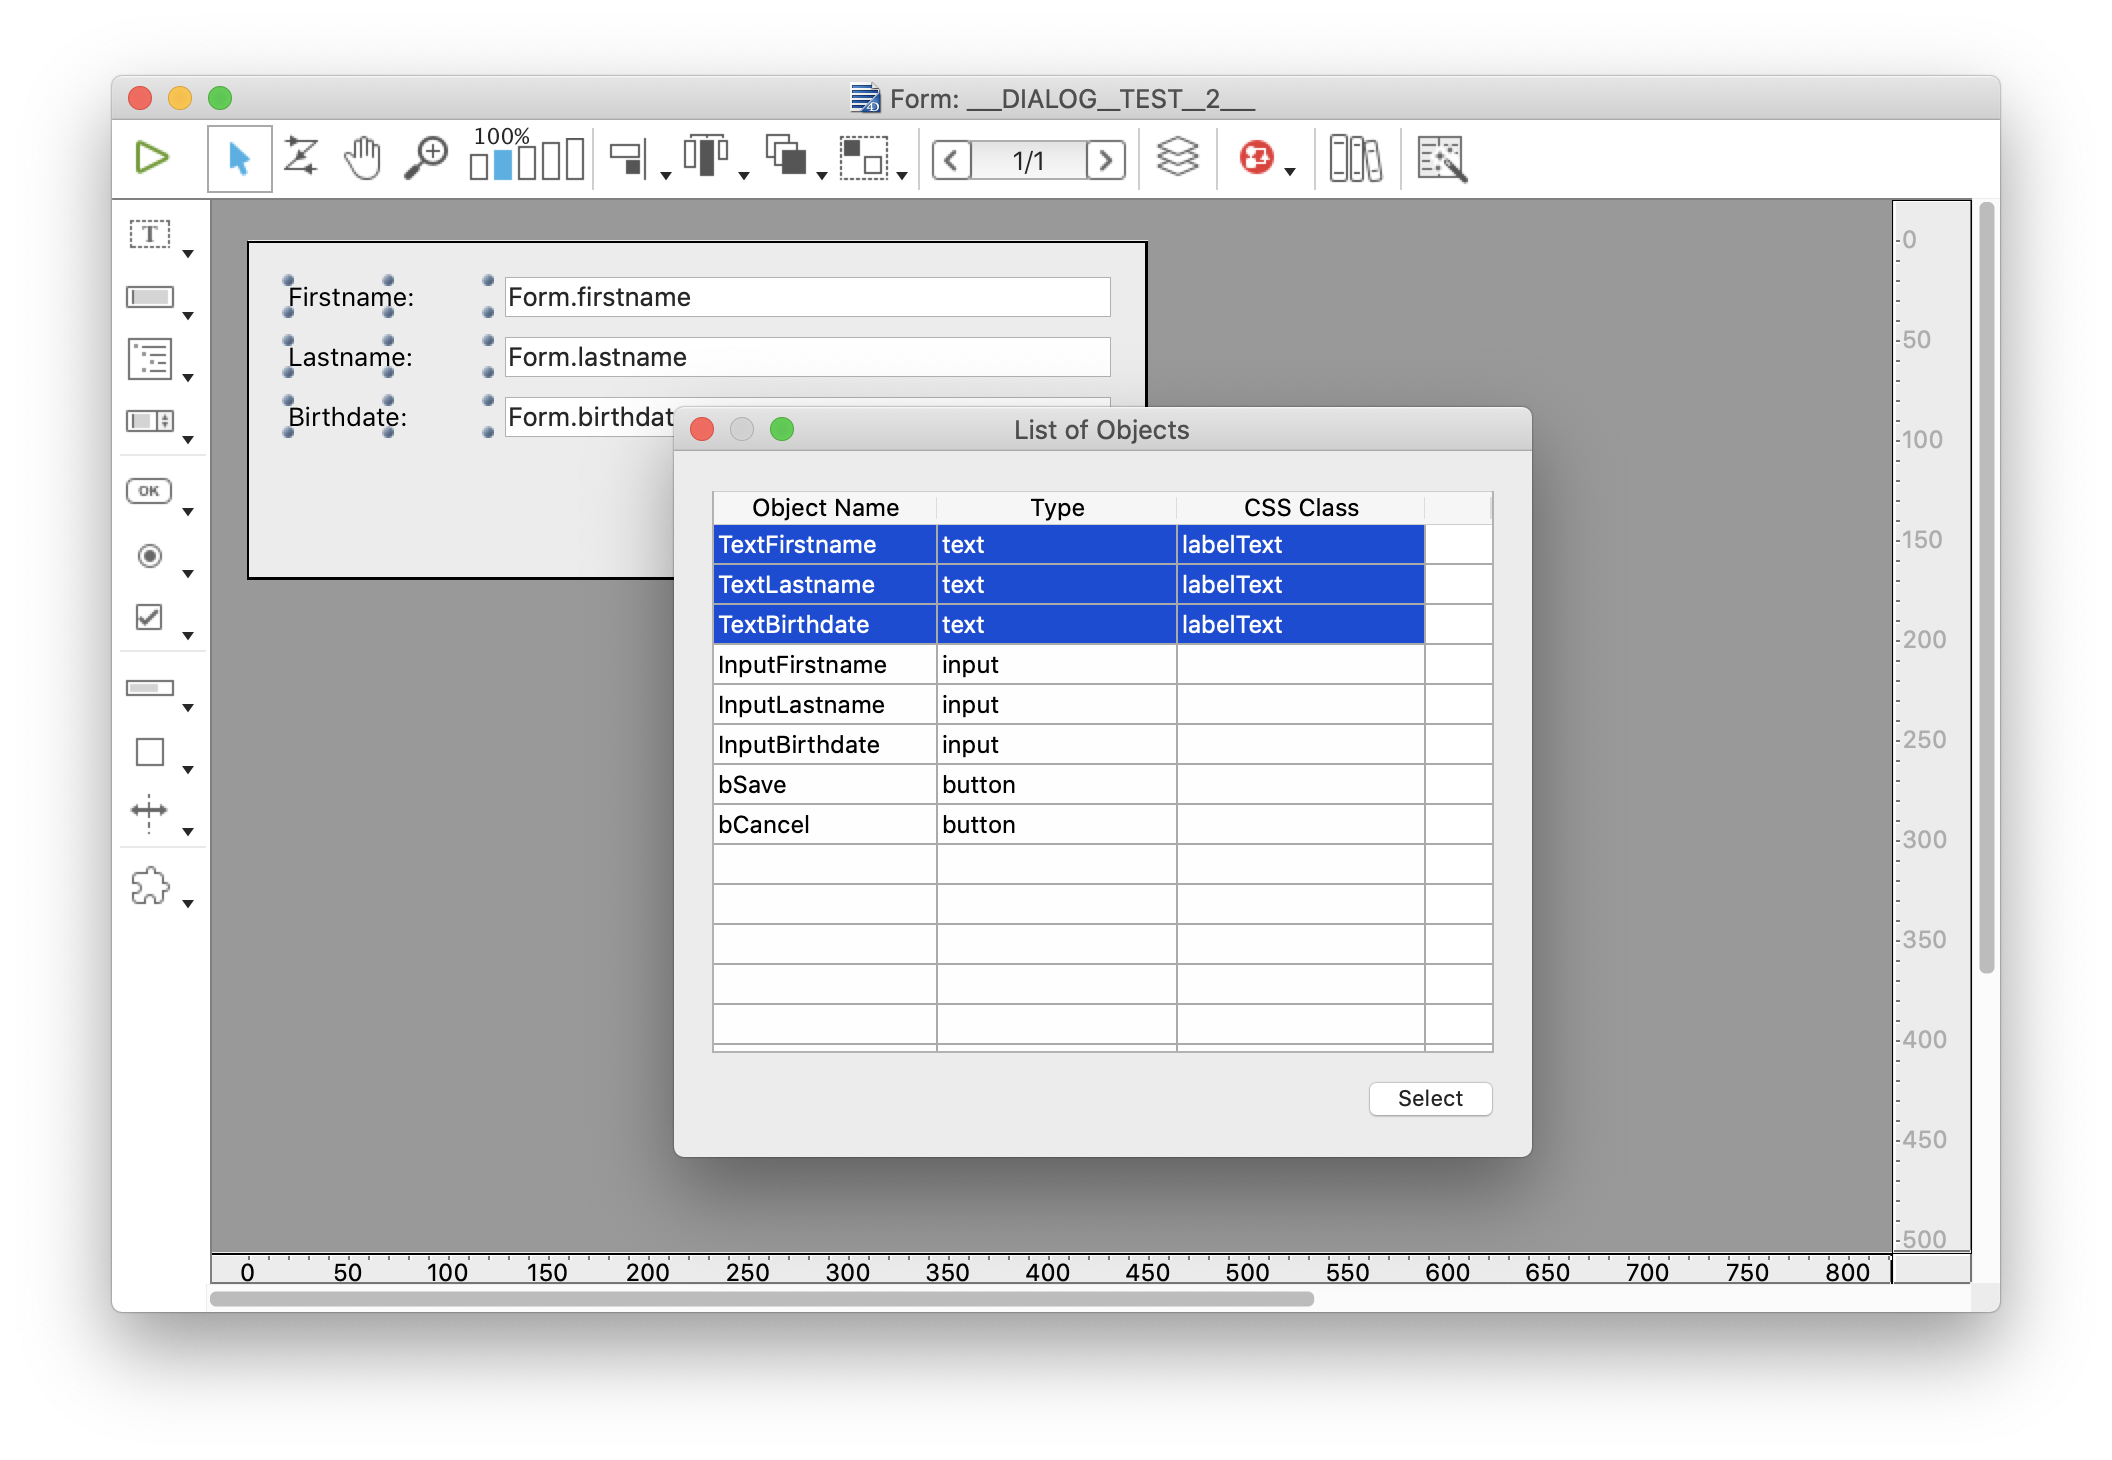
The “ObjectList” class contains the code of the macro, it’s available in the “HDI_FormMacro” component on GitHub.
To align objects to a reference object in 4D, you need to go through the alignment dialog. Why not select several objects and decide that the object below the click context is the reference object? Thus in your code:
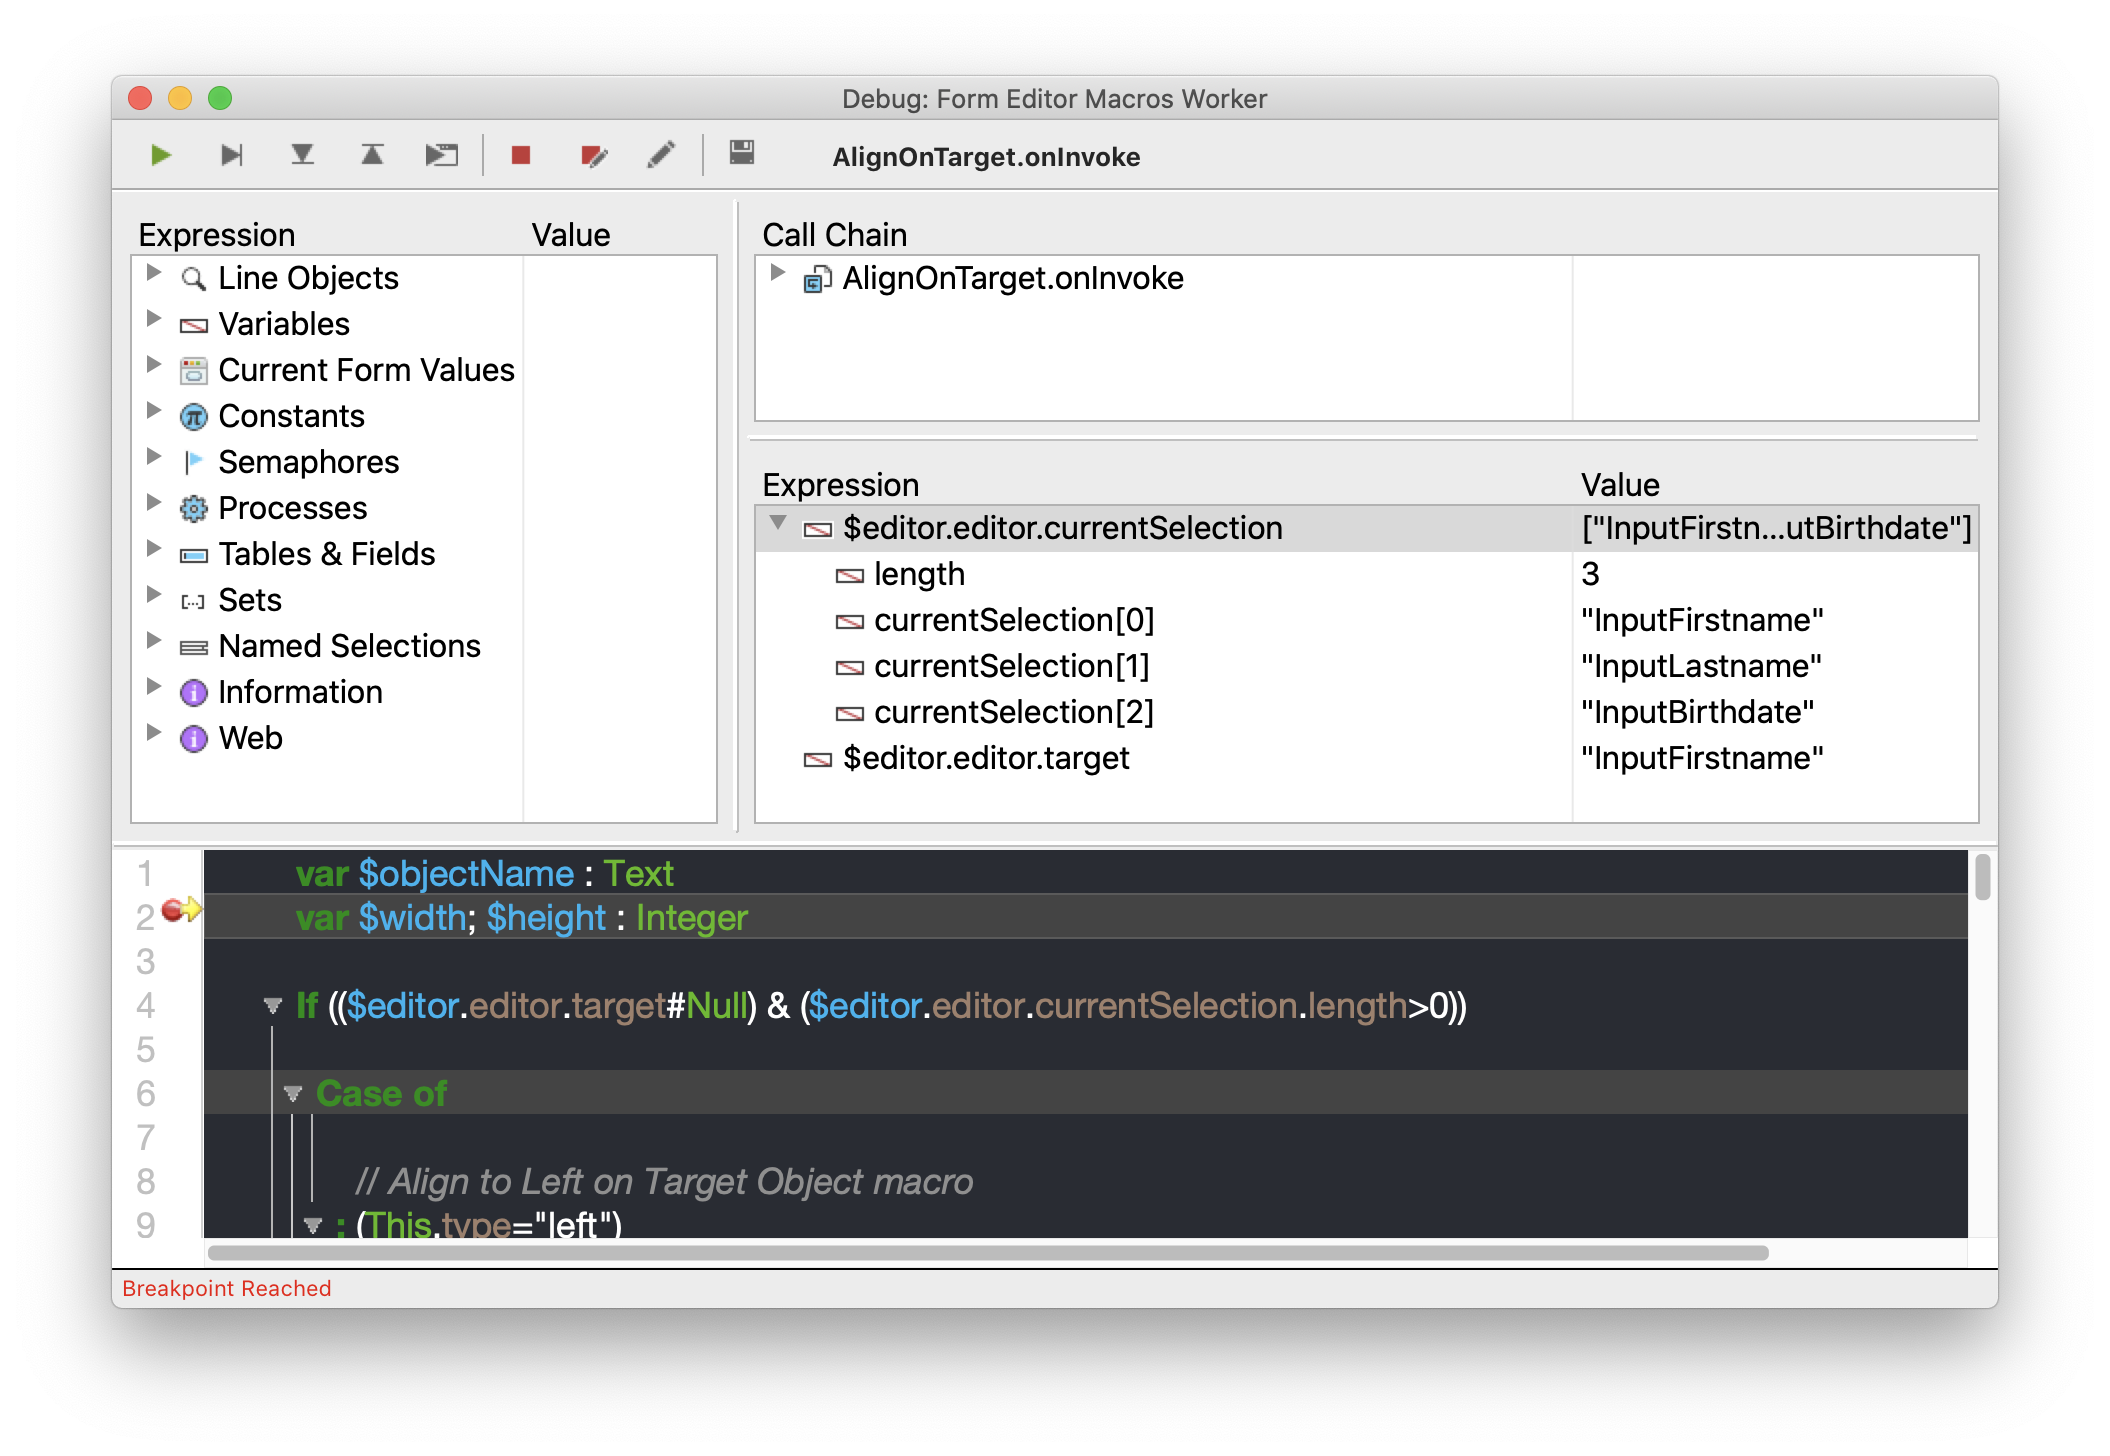
Voilà! Thanks to this information, you can create all of the alignments or distributions you want. In the “AlignOnTarget” class, you have an example of left, right, top, and bottom alignment relative to an object. In this macro, groups are not implemented, so if you add this option, feel free to share it back on GitHub!
Got a question, suggestion or just want to get in touch with the 4D bloggers? Drop us a line!
* Your privacy is very important to us. Please click here to view our Policy
Comments are not currently available for this post.