
4D Write Pro : Say Welcome to Floating Text Boxes!
January 16, 2023
5 min read
4D Write Pro is an essential product for creating business documents. That’s why with every feature release, we give you more features to nail your work, and this time, 4D v19 R8 is bringing floating text boxes to 4D Write Pro.
So if you are required to use text boxes, let’s say, to create company letters in compliance with the company identity, you are free to get started right away.
Text boxes may be familiar to some, but it may be helpful to recall what they are!
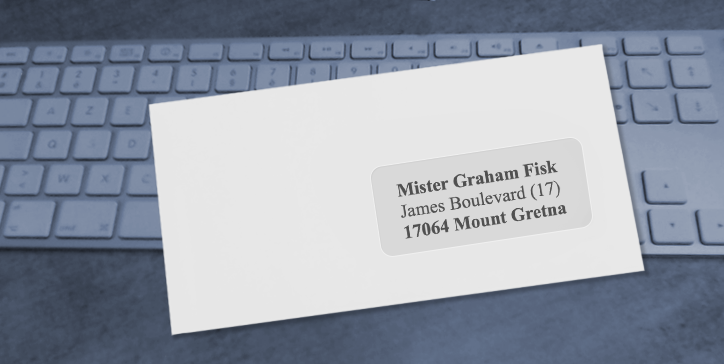
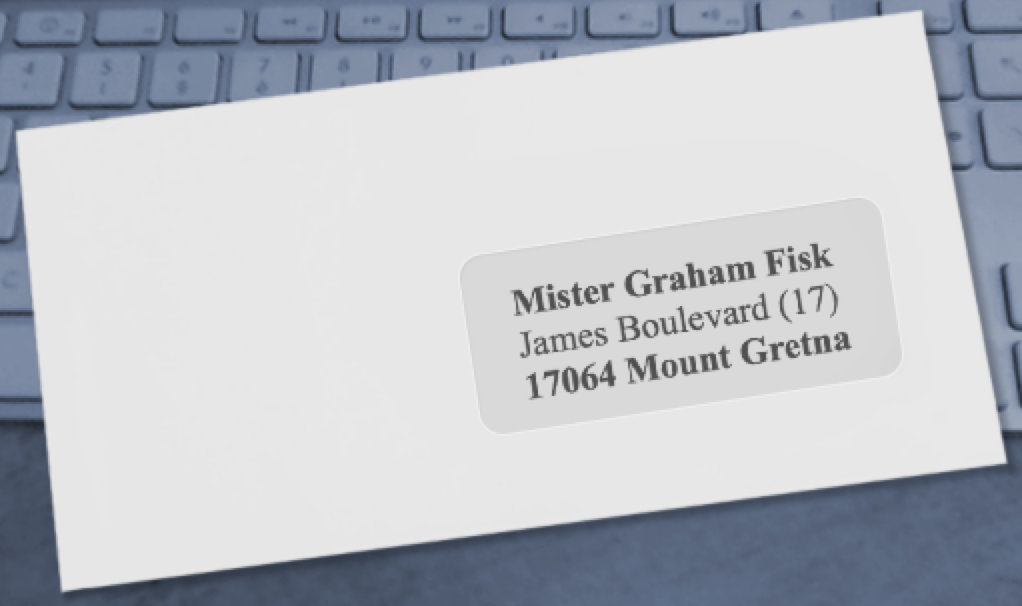
A text box is a floating text area of any size containing text, images, or tables! They can be used in very different ways, for example, to position an address at a specific place on the paper so that it appears clearly in the envelope window.
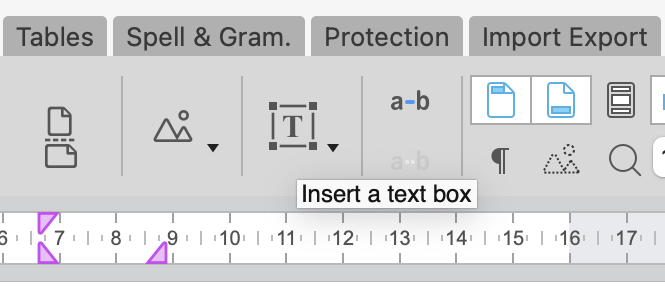
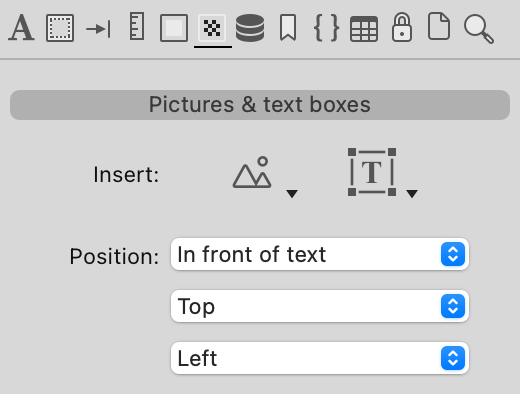
As usual, several solutions are possible; the easiest is to use the interface. New buttons are available for this in the toolbar and the sidebar.
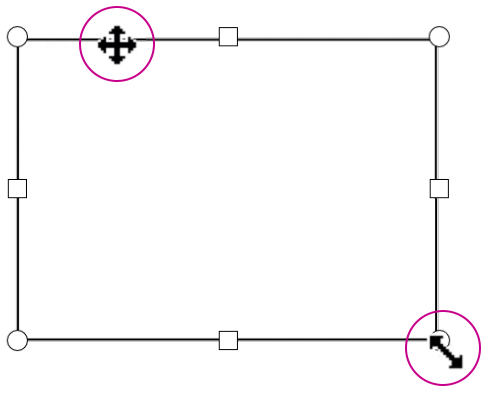
Once created, the text boxes can be moved by clicking on their borders and resized with the handles.
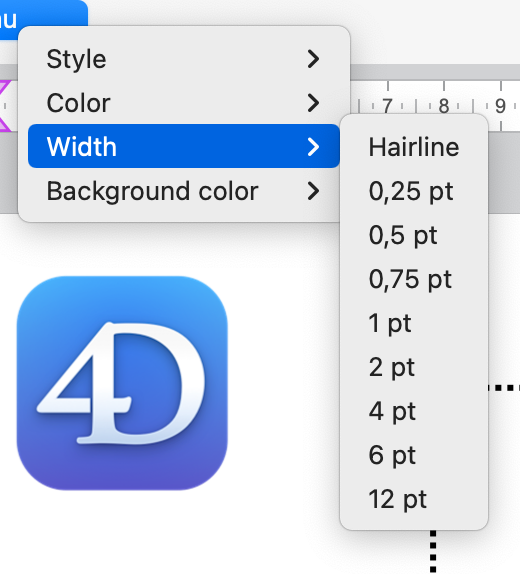
Text boxes have their own attributes. These attributes can be modified by programming and simply by using the interface.
You can choose the type of border, the color, the thickness, and the background color of each text box.
As for the content, you can use the text boxes to insert text, images, and tables, all of which can, of course, contain formulas.

New commands and standard actions have been created to programmatically create and delete text boxes.
Let’s start with commands!
Two new commands have been created to insert and delete text boxes…
… and many (many) existing commands have been improved to take these new objects as parameters!
Here are some of them:
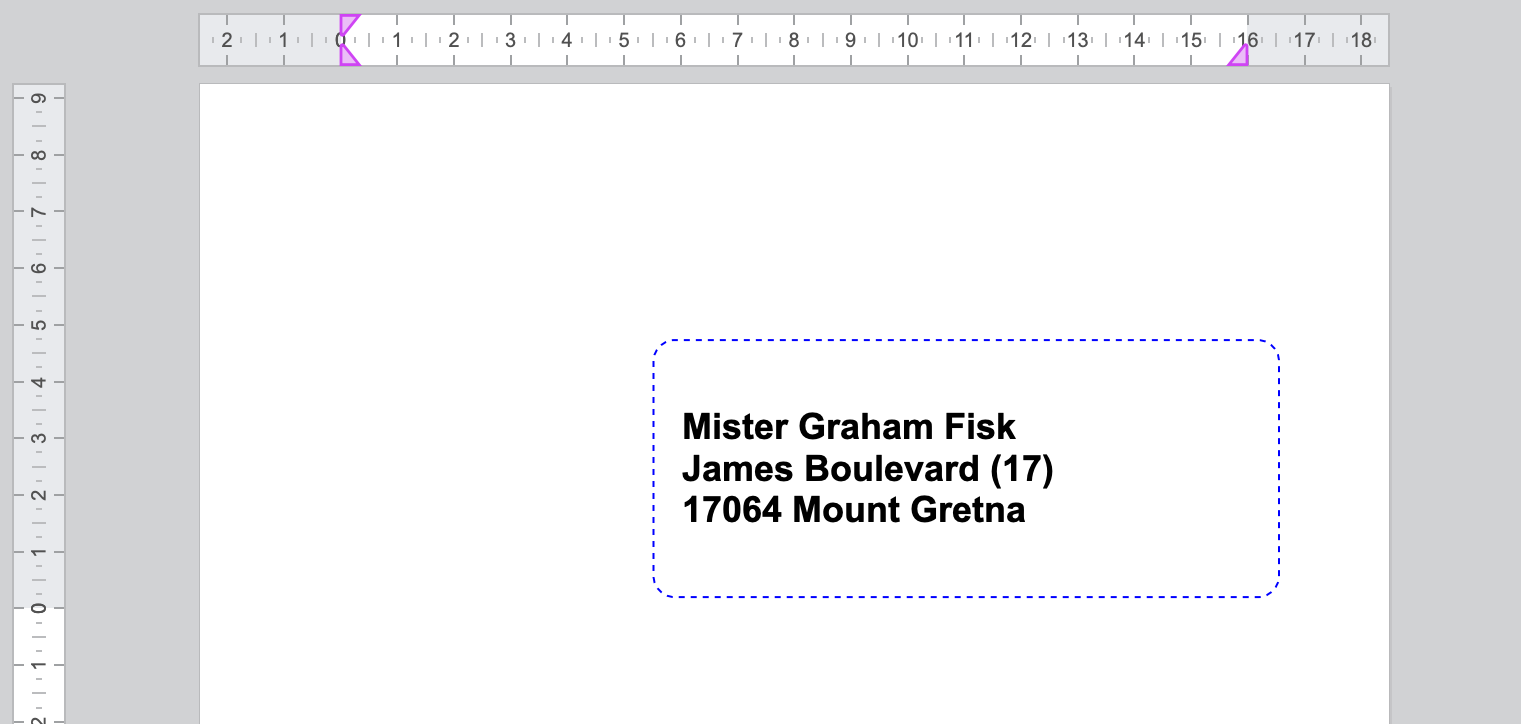
In this example, we want to create a text box that has the following characteristics:
Its content should measure 10 cm x 3.5 cm, have 0.5 cm inner margins, and be positioned 8 cm and 4.5 cm from the top left corner of the page. Finally, it should be marked with blue dotted edges and have rounded corners.
To do so, here is the code to write.
// #1 create the the text box
$textBox:=WP New text box(WParea; 1)

// #2 define some text box attributes
WP SET ATTRIBUTES($textBox; wk id; "AddressArea")
// define anchoring and position
WP SET ATTRIBUTES($textBox; wk anchor origin; wk paper box)
WP SET ATTRIBUTES($textBox; wk anchor horizontal align; wk left; wk vertical align; wk top)
WP SET ATTRIBUTES($textBox; wk anchor horizontal offset; "8cm"; wk anchor vertical offset; "4.5cm")

// define size and style
WP SET ATTRIBUTES($textBox; wk padding; "0.5cm")  // inside margins
WP SET ATTRIBUTES($textBox; wk width; "10cm"; wk height; "3.5cm")
WP SET ATTRIBUTES($textBox; wk border style; wk dashed; wk border color; "Blue"; wk border width; "1pt"; wk border radius; "10pt")
WP SET ATTRIBUTES($textBox; wk vertical align; wk center)

// #3: insert some formulas inside the text box
WP INSERT FORMULA($textBox; Formula(This.data.fullName); wk append)
WP INSERT BREAK($textBox; wk paragraph break; wk append)
WP INSERT FORMULA($textBox; Formula(This.data.fullAddress); wk append)

// #4: Set style to the content of the text box
WP SET ATTRIBUTES($textBox; wk font; "Arial"; wk font bold; wk true; wk font size; "18pt")
Don’t feel like programming today? No problem; the standard actions are there for you!
“insertTextBox” is the new standard action to create text boxes, but prefix textbox/ can also be used to set parameters like margins, borders, padding, background, etc.
Here are some examples:
Or you can create your own menu…
$menu:=Create menu
APPEND MENU ITEM($menu; ak standard action title)
SET MENU ITEM PROPERTY($menu; -1; Associated standard action name; "textBox/borderStyle")

APPEND MENU ITEM($menu; ak standard action title)
SET MENU ITEM PROPERTY($menu; -1; Associated standard action name; "textBox/borderColor")

APPEND MENU ITEM($menu; ak standard action title)
SET MENU ITEM PROPERTY($menu; -1; Associated standard action name; "textBox/borderWidth")

APPEND MENU ITEM($menu; ak standard action title)
SET MENU ITEM PROPERTY($menu; -1; Associated standard action name; "textBox/backgroundColor")

$value:=Dynamic pop up menu($menu)
// no need to check the $value, all items are based on standard actions!
// just don't forget to release the menu to avoid memory leaks!
RELEASE MENU($menu)
And here is the created menu:
Of course, most export formats consider these text boxes. In the case of HTML export, just remind that anchoring must be based on Embedded mode, not Page mode!
This new feature is a significant breakthrough in 4D Write Pro. It allows the creation of more elaborate documents while remaining very easy to use.
Got a question, suggestion or just want to get in touch with the 4D bloggers? Drop us a line!
* Your privacy is very important to us. Please click here to view our Policy
Comments are not currently available for this post.