
My first experience with crafting a Qodly custom component with AI

October 14, 2026
5 min read
In this blog post, I tell the story of how I got started developing my first custom component for Qodly without writing a single line of code or building anything on my own. All the hard work was done by AI, guided by clear prompts.
With just a few appropriate prompts, I got my first custom component using VSCode and Github Copilot. Thanks to AI, you can stay focused on specifying your needs, on what you want, and forget about complex technical development matters.
Keep reading to learn more.
As explained in the documentation, if you need a component that 4D Qodly Pro does not provide natively, a custom component is a flexible solution.
It can be shared across diverse projects or within the Qodly community. Once available, it is used just like any native Qodly component.
First, I watched this complete demo. Once I had understood the main idea, I followed these steps.
To work properly, AI needs a set of skills. Skills are the guidelines that AI must follow as a method. Thanks to these skills, AI knows how to implement a custom component (framework, architecture, etc.) as well as how to write automated tests.
I downloaded those skills from this Github repository.
In VS Code, I created an empty folder and then created the folder .github/skills with the skills inside.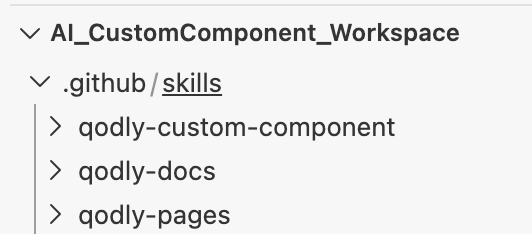
My role was to describe the contract of the component: its inputs, the events to listen to, its behavior, etc.
Given that short specification and the skills, the AI implements the custom component on its own.
The information to provide is:
– the component name and purpose
– properties: the properties driving the component’s behavior
– appearance: how the component looks like in design and in rendering mode
– events: the user actions the component must respond to
– behavior: how the component behaves depending on the events and its properties
All of this is given to the AI in natural language.
My aim was to have a very simple component able to copy a Qodly string datasource into the clipboard (of the machine where the click occurs). This component does not exist natively in 4D Qodly Pro.
Time to prompt the AI. As explained in the video, the prompt relies on a kind of mini-specification: a contract in three main parts, as described above.
After installing the skills, I sent my first prompt: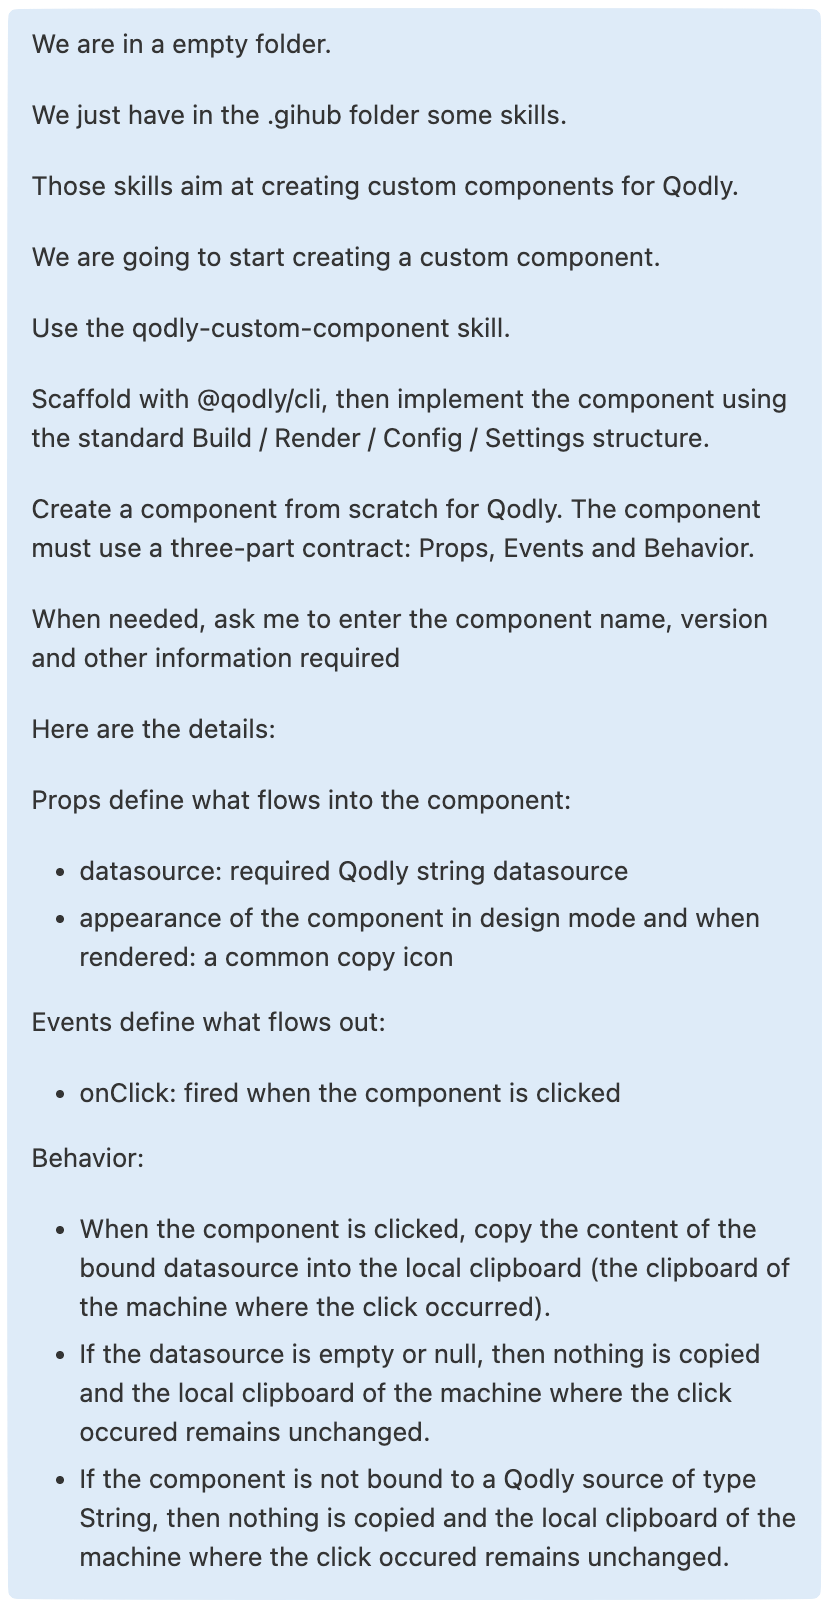
We are in a empty folder.
We just have in the .gihub folder some skills.
Those skills aim at creating custom components for Qodly.
We are going to start creating a custom component.
Use the qodly-custom-component skill.
Scaffold with @qodly/cli, then implement the component using the standard Build / Render / Config / Settings structure.
Create a component from scratch for Qodly. The component must use a three-part contract: Props, Events and Behavior.
When needed, ask me to enter the component name, version and other information required
Here are the details:
Props define what flows into the component:
• datasource: required Qodly string datasource
• appearance of the component in design mode and when rendered: a common copy icon
Events define what flows out:
• onClick: fired when the component is clicked
Behavior:
• When the component is clicked, copy the content of the bound datasource into the local clipboard (the clipboard of the machine where the click occurred).
• If the datasource is empty or null, nothing is copied and the local clipboard of the machine where the click occurred remains unchanged.
• If the component is not bound to a Qodly datasource of type String, nothing is copied and the local clipboard of the machine where the click occurred remains unchanged.
Here is the answer I got: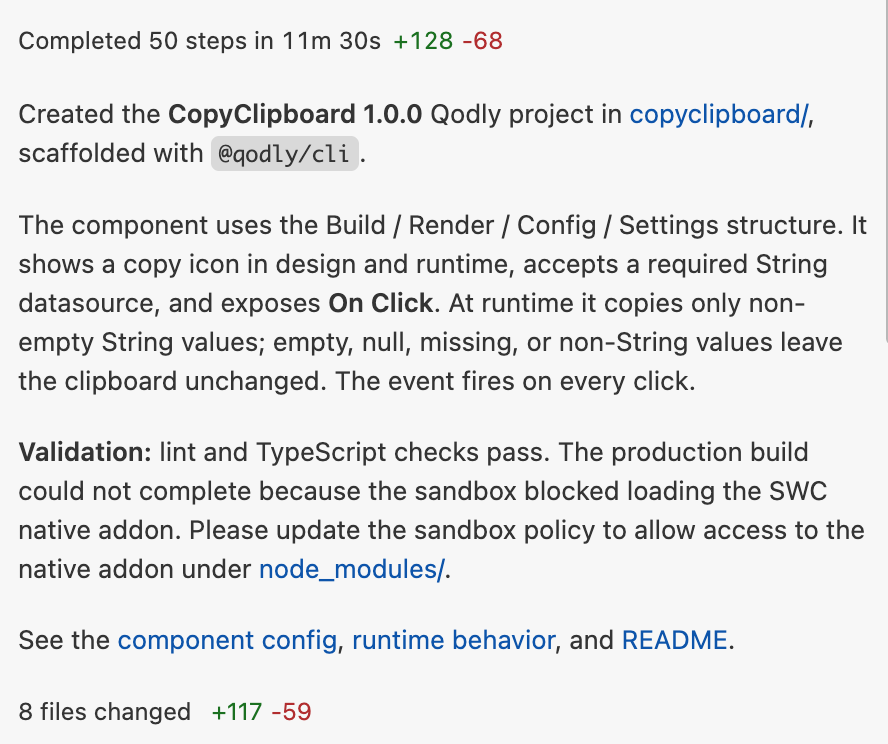
And my copyclipboard custom component had been created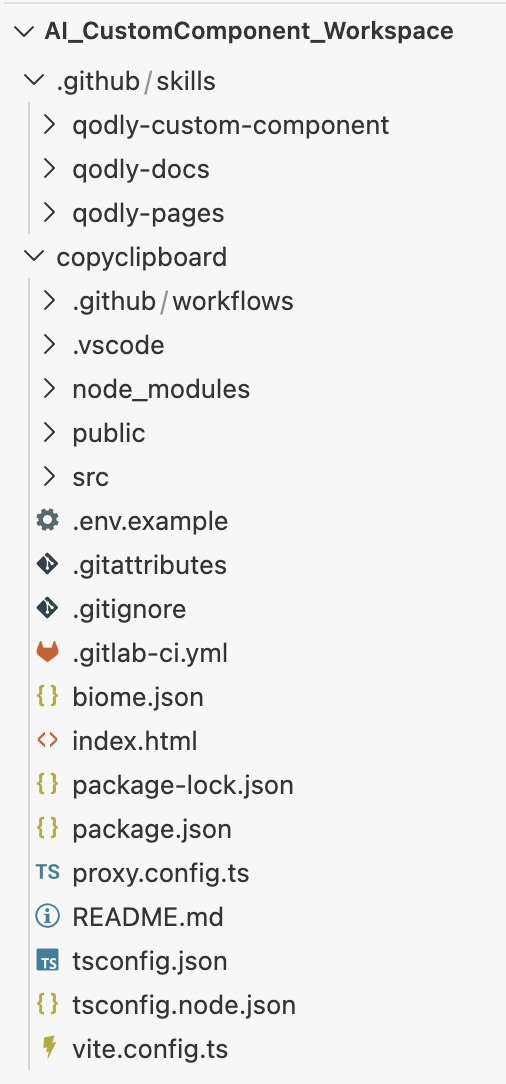
Then I asked how to test the component locally. Copilot told me to run:
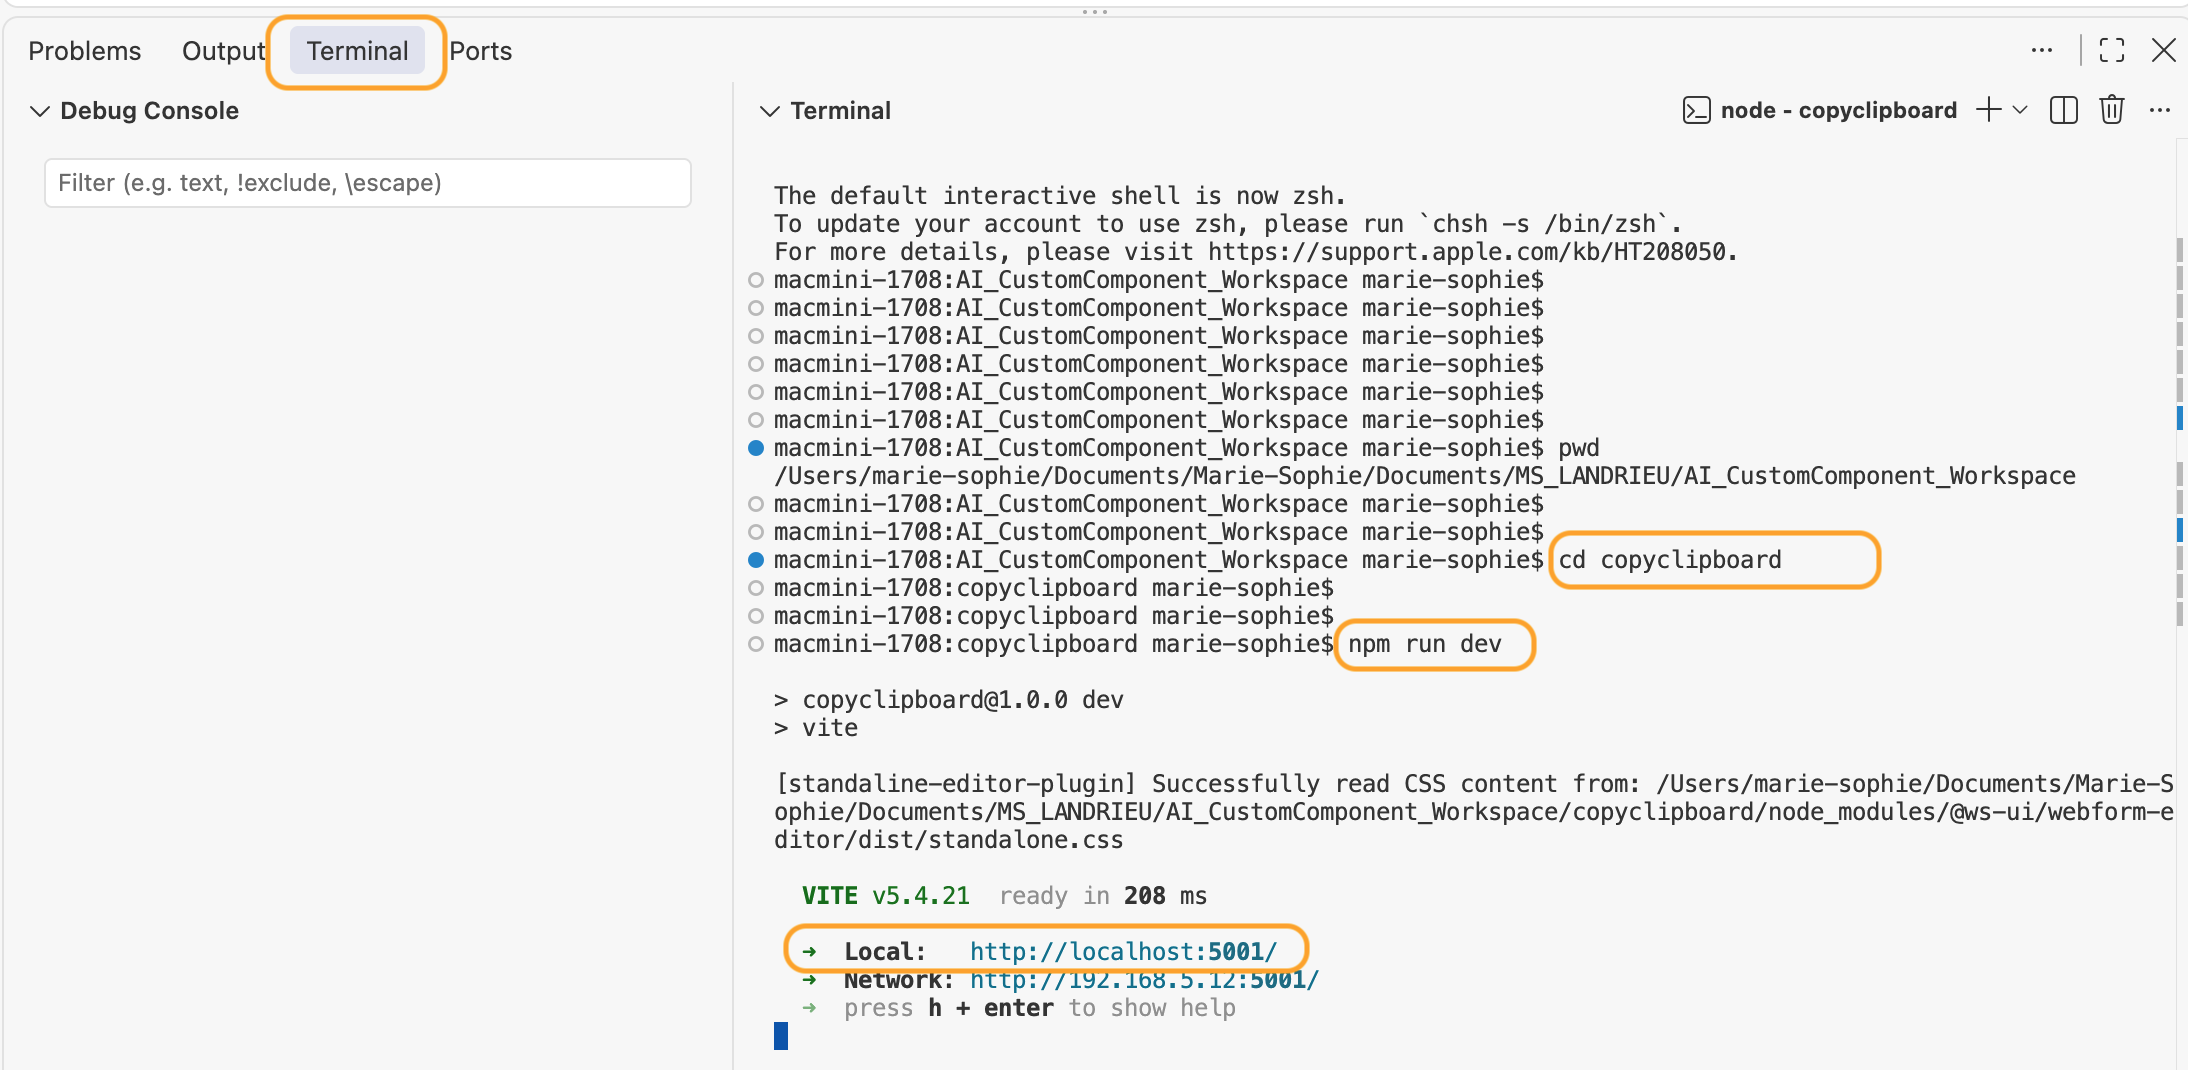
The custom component can then be tested locally by opening http://localhost:5001/ in a browser
http://localhost:5001/ is the local URL of the Vite server. It serves only a local development environment that includes the custom component. To benefit from all the Qodly Studio features, such as Qodly sources and available ORDA functions, you must make sure to serve a 4D project’s Qodly Studio instance on HTTPS port 7443.
So I created and opened an empty 4D project with these web settings: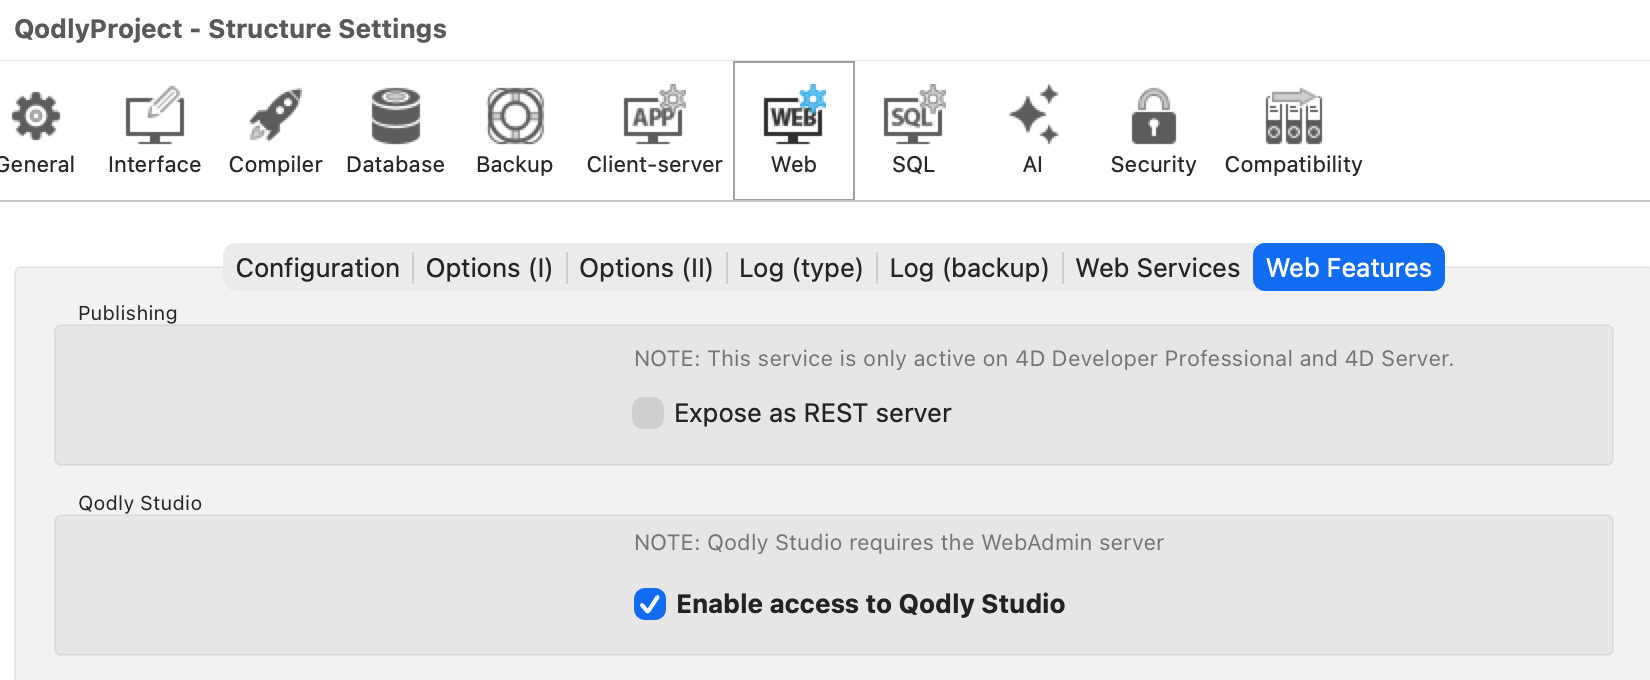
And the 4D instance’s web administration settings are: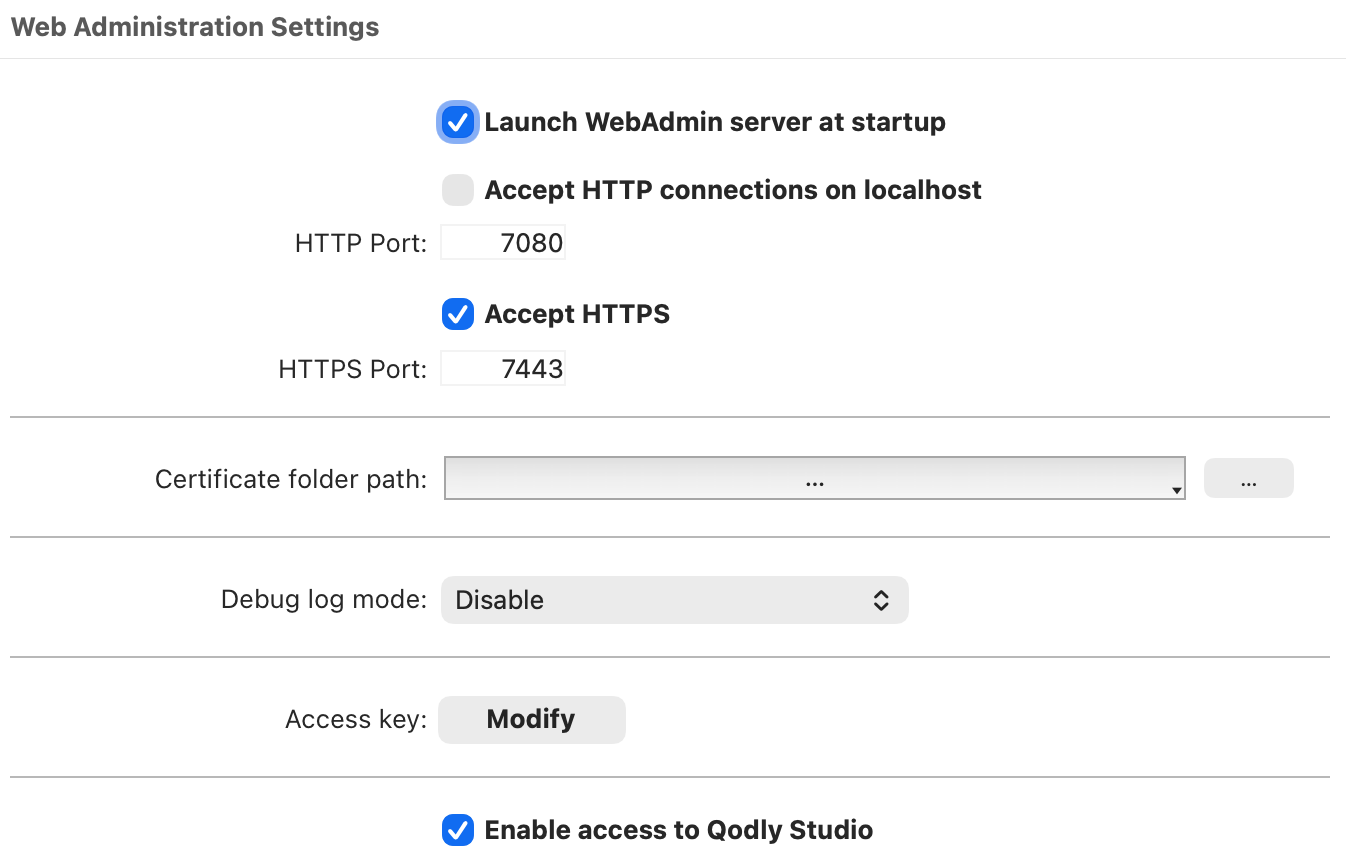
This way, my 4D project’s Qodly Studio instance is served at https://localhost:7443/studio. It is used by the local development environment while running http://localhost:5001/.
And here is the result!
To build and publish the final version of the my custom component, I simply asked Copilot to build it as done for other already existing custom components. I gave Copilot an example (e.g. https://github.com/b-fadwa/Qodly-file-download).
I also asked it to publish the component to a given GitHub repository, with both the source part and the releases.
And that’s it.
This first experience shows that AI considerably lowers the barrier to extending Qodly Studio. If you can describe what a component should do (its properties, its events and its behavior), AI can build it for you.
The possibilities for customizing Qodly Studio are therefore very broad: a “copy to clipboard” button today, but tomorrow any component your applications need, without being a front-end expert. The only real limit is the clarity of your specification.
Got a question, suggestion or just want to get in touch with the 4D bloggers? Drop us a line!
* Your privacy is very important to us. Please click here to view our Policy
Comments are not currently available for this post.