Banking app tutorial with 4D for iOS
August 20, 2018
2 min read
4D for iOS offers various templates which allow you to develop apps that fit your business needs. Following the
Contact App tutorial, this Tip blog post demonstrates step by step how to create a banking app using graphs! A visual representation of your clients’ available credit, their credit limit, current balance, and so on.
Before getting our hands dirty, don’t forget to download the Starter Project containing the database file and project icon.
Note: If you haven’t already done so, you may want to check 4D for iOS documentation for a basic understanding of the tool and how to configure your projects.
Creating the project
Click on Toolbar New button > Mobile Project and give your project a name. In this example, we chose to name it Banking Demo app.
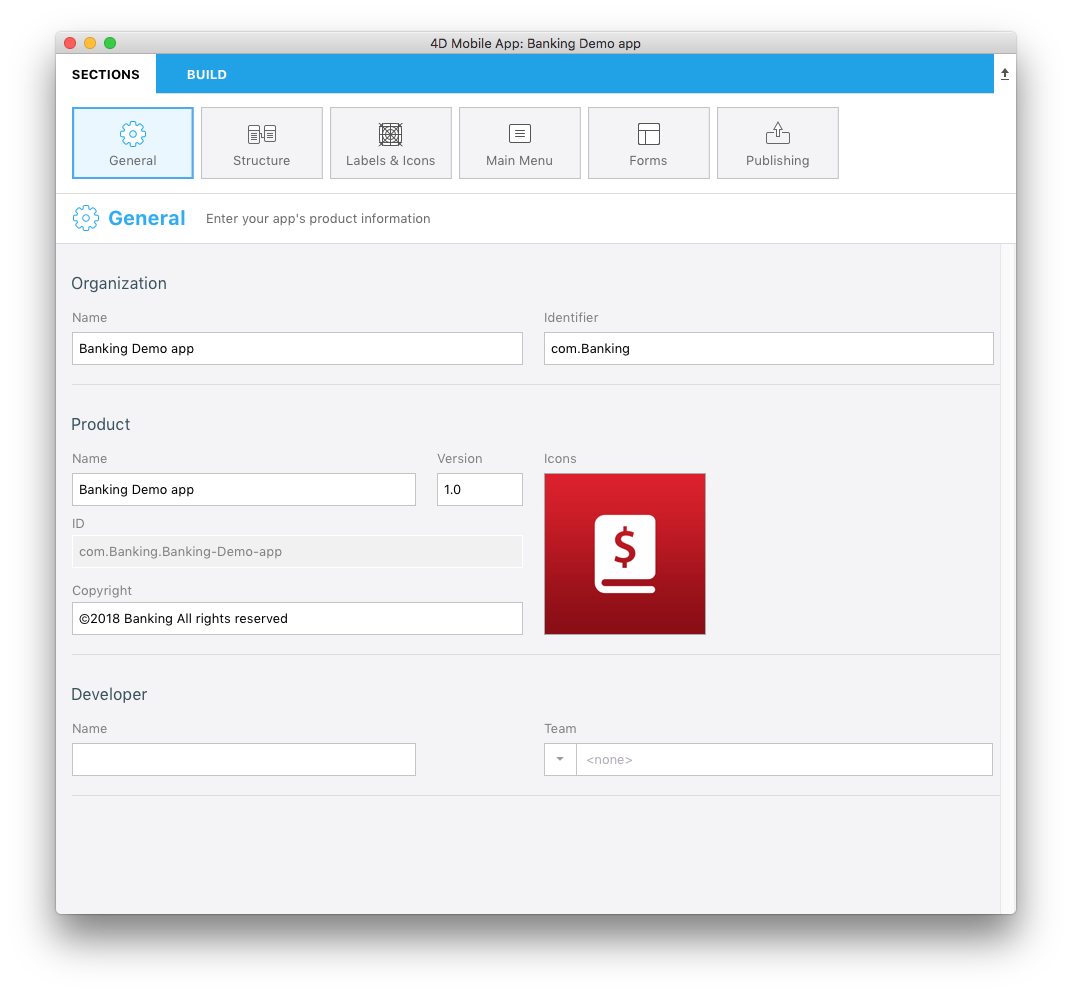
From the Sections > General tab, enter your app info as shown below:
Then on the Structure tab, select and publish all available fields.
Finally, define labels (both long and short) and icons for the tables you’ve just published on the Labels & Icons tab.
Forms definition
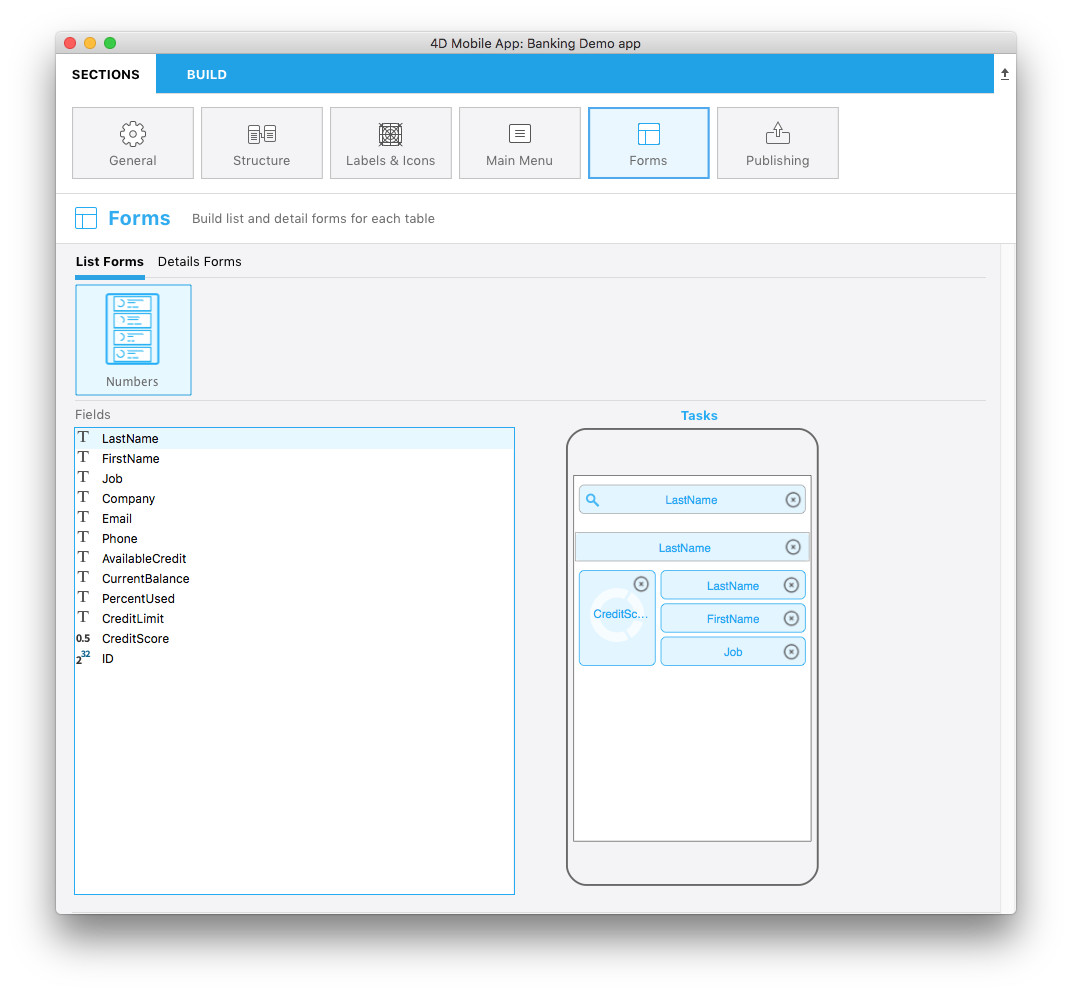
List Form
In Sections > Forms > List Forms, select the Tasks template. This template will allow you to display nice charts for each cell of your list.
Then in the content definition graphic, drag and drop the:
- CreditScore field into the Field 1 area
- LastName field into the Title area
- FirstName field into the first Subtitle area
- Job field into the second Subtitle area
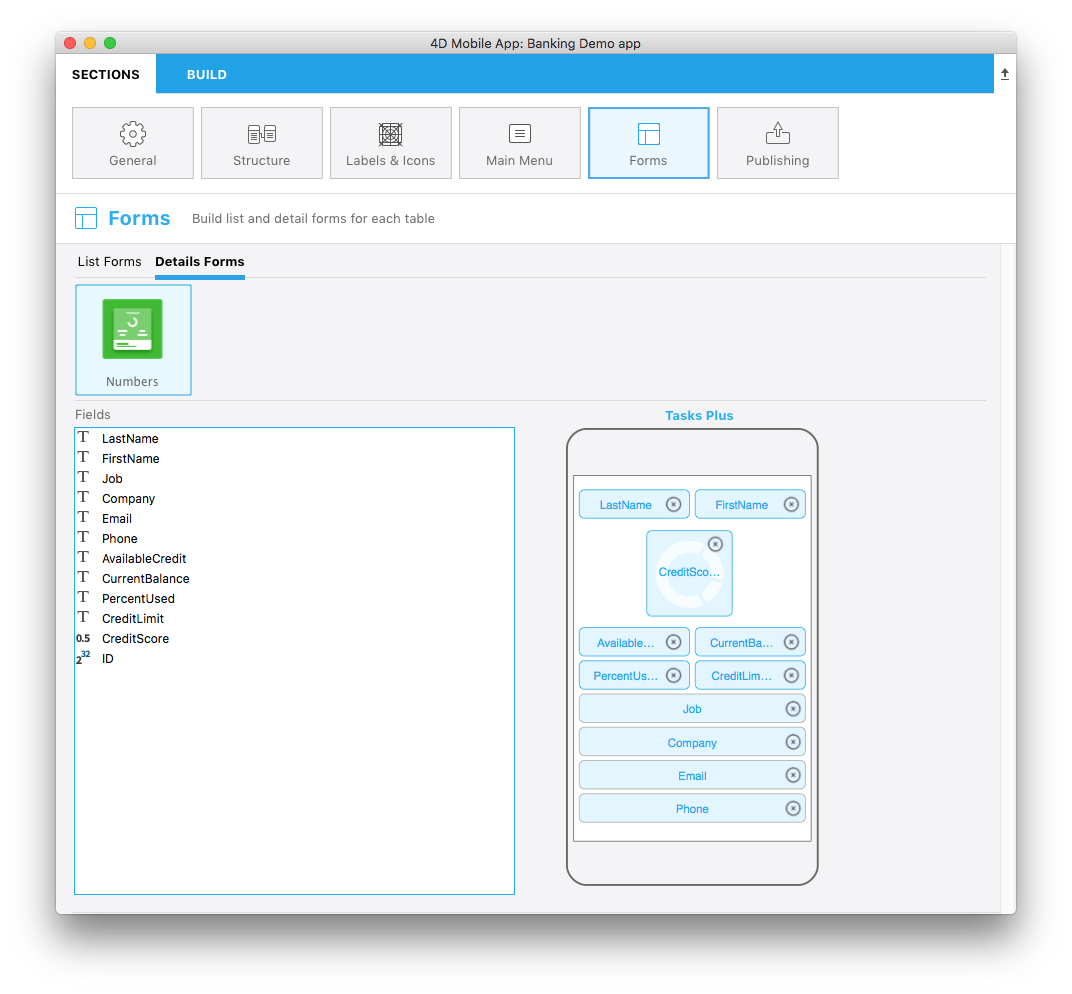
Details Form
Now that your list form is ready, let’s move on to your app’s details form. In Sections > Forms > Details Forms, select the template Tasks Plus (optimized to display charts).
As you did for the list form, drag and drop your fields onto the content definition graphic:
Go to the
Build Tab, select iPhone X as the Simulator device, and click on the
Build and Run button.
Congratulations! Your Banking app is alive … with nice and clean chart animations!


Comments are not currently available for this post.