
AI Coding with 4D and VS Code: A Practical Guide
March 27, 2026
13 min read

If you recently watched our webinar on AI coding with 4D 21, you saw how we built a complete travel agency application (database structure, data, forms, and an AI-powered feature) built almost entirely through natural language prompts. In this post, we’ll walk you through the setup and show you how to bring that same workflow to your own projects.
Before anything else: GitHub Copilot runs through your GitHub account, not through OpenAI, Anthropic, or any other AI provider directly. You do not need to purchase credits from Claude or any other service. Everything is managed through GitHub.
1. Create a GitHub account if you don’t have one: github.com
2. Activate GitHub Copilot on your account at github.com/features/copilot. A free tier with a generous monthly allowance is included, no credit card required to start.
3. Sign in from VS Code. Open VS Code, click the Accounts icon in the bottom-left corner, and sign in with your GitHub account. Once connected, the Copilot icon appears in the status bar and Chat becomes available.
4. Select your model. In the Copilot Chat panel, a model selector lets you choose which AI model powers your responses (GPT-4o, Claude, Gemini, and others depending on your plan). The default works fine to start, you can switch later.
To check usage and manage your plan: Go to github.com/settings/copilot. You can see how many requests you’ve used, switch to a paid plan, and manage billing if you need more capacity.
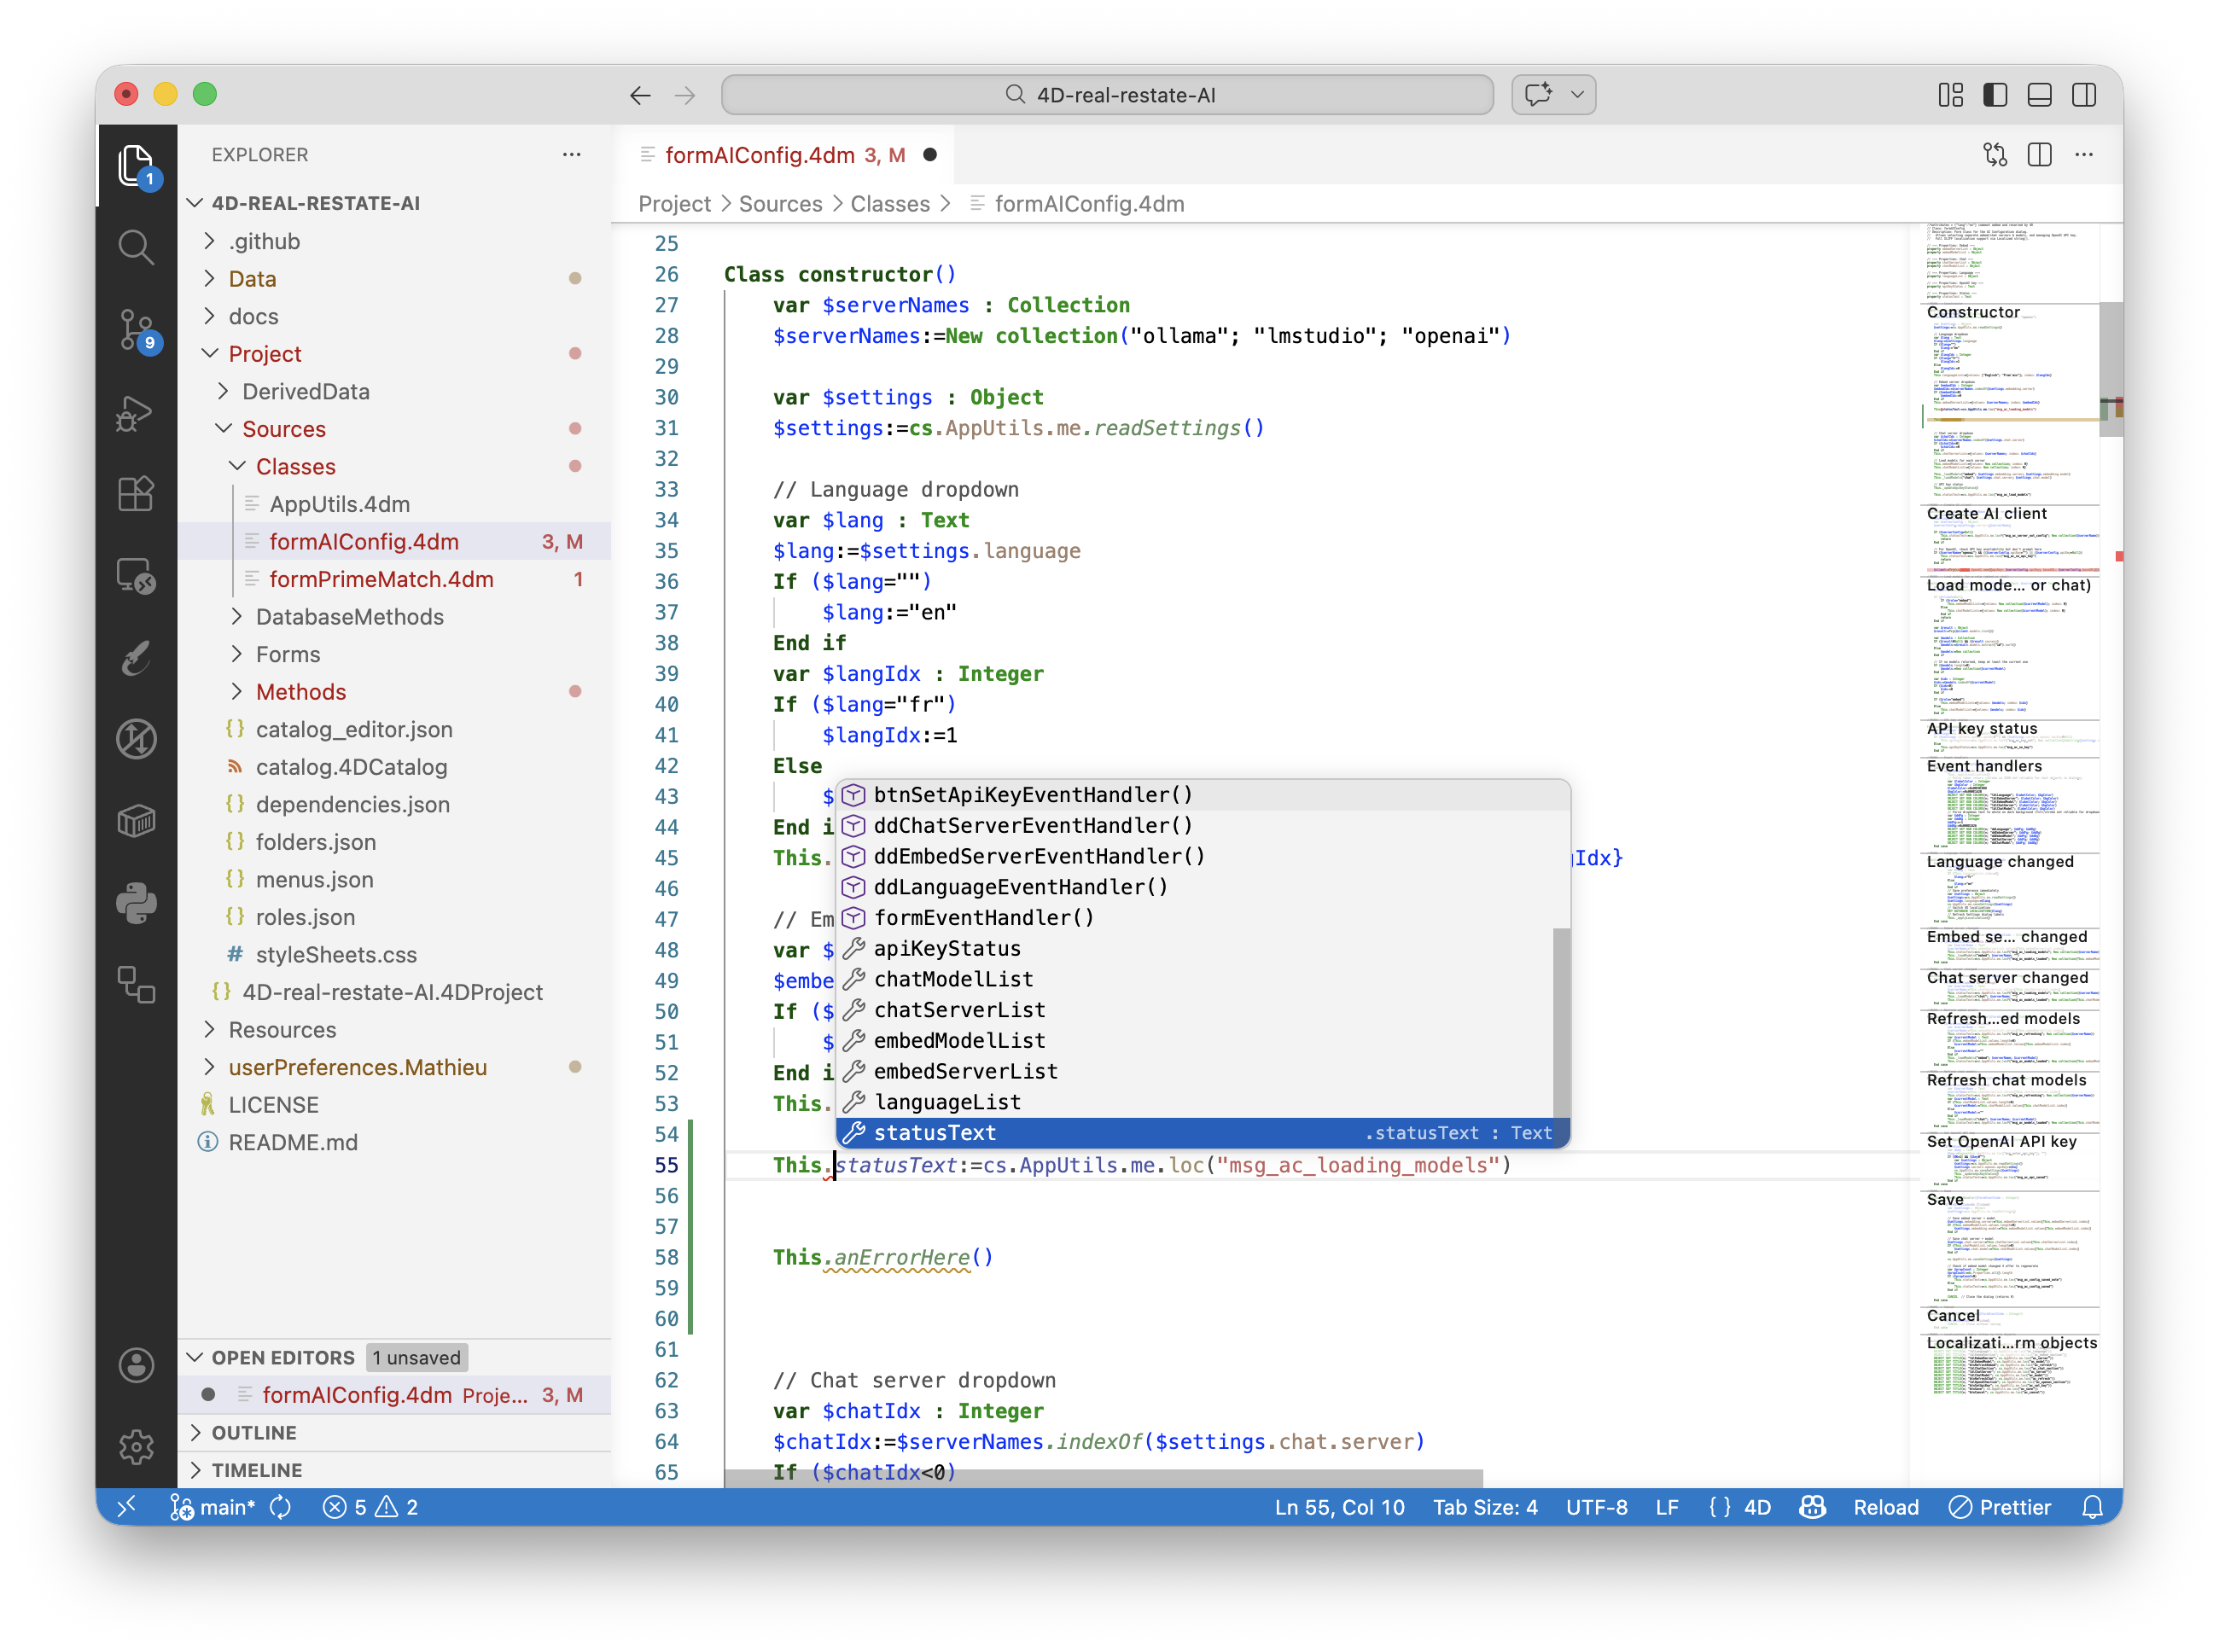
The 4D Analyzer extension is what makes VS Code truly aware of the 4D language. Install it from the VS Code Marketplace and you get:
This matters a lot when working with AI. When GitHub Copilot generates 4D code, the Analyzer immediately validates it. You see errors highlighted right in the editor, which means you can catch mistakes before you even try to run the code, and feed them back to Copilot to get a fix.
To install:
That’s it. Open any 4D project folder and the extension activates automatically.
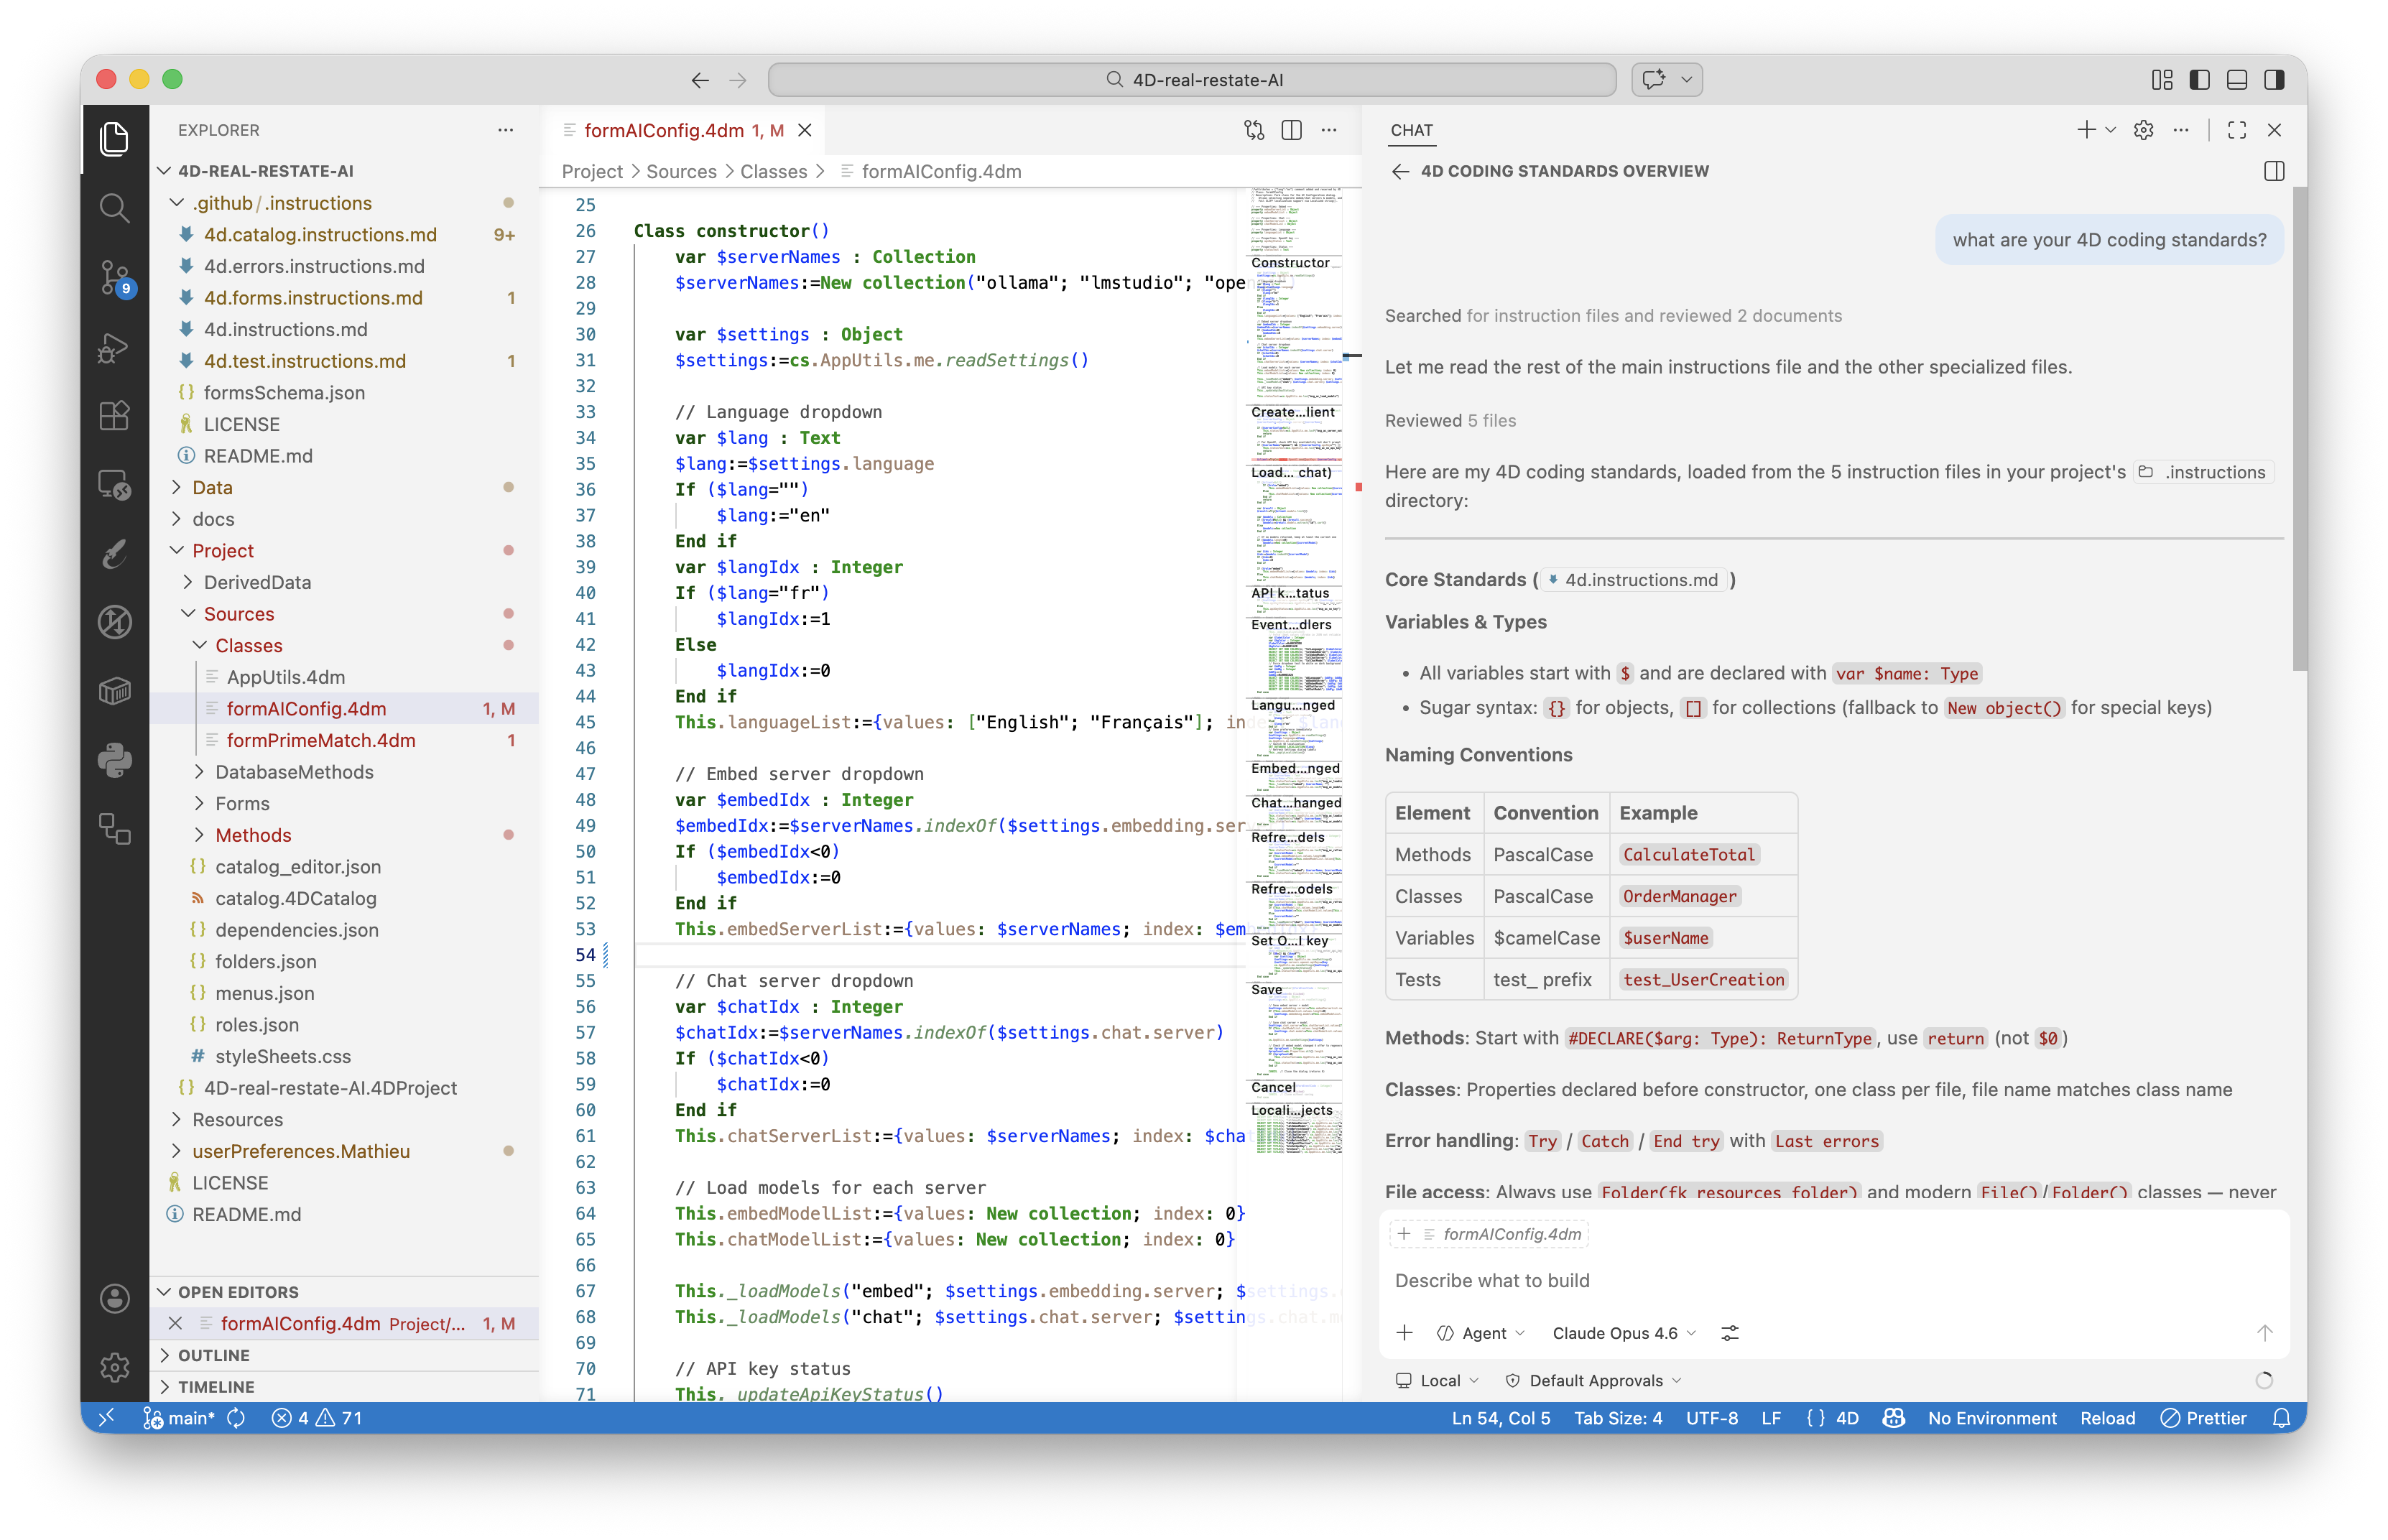
Out of the box, GitHub Copilot knows many programming languages, but not your coding style, your best practices, or the finer points of 4D development. That’s where instruction files come in.
Instruction files are Markdown documents placed in a .github/instructions/ folder at the root of your project. Copilot reads them automatically and uses them as context for every response. Think of them as a style guide that the AI follows.
A ready-to-use set of 4D instruction files is available on GitHub:
👉 github.com/mathieu-ferry/4D-github-instructions
If it does, you’re good to go. The instructions cover topics like:
Tip: These files are a starting point. The best results come when you tailor them to your own coding habits and project conventions. Add your own rules, remove what doesn’t apply, and iterate over time.
When you work with the Structure editor, changes are reflected in the catalog.4DCatalog file. With the instruction files from the GitHub repository, Copilot can safely edit this same file for you (the schema context is included in those instructions). You stay prompt-driven, and after restart, the structure changes are immediately visible in 4D. Here’s a realistic sequence:
You: “Create a table in the catalog listing employees with their last name and first name.”
Copilot edits your structure. Restart 4D, and you get an Employee table with a UUID primary key and the requested fields.
You: “Create a new table listing company departments.”
Another table appears.
You: “Add a relation between employees and departments, with each employee belonging to one department.”
Copilot adds a foreign key and the proper relation definition. You build out an entire relational model this way, step by step, just by talking to the AI.
The key insight: you describe intent in plain language, and the AI handles the catalog details. The instruction files keep output aligned with your expected conventions (UUID keys, proper attribute types, correct relation syntax).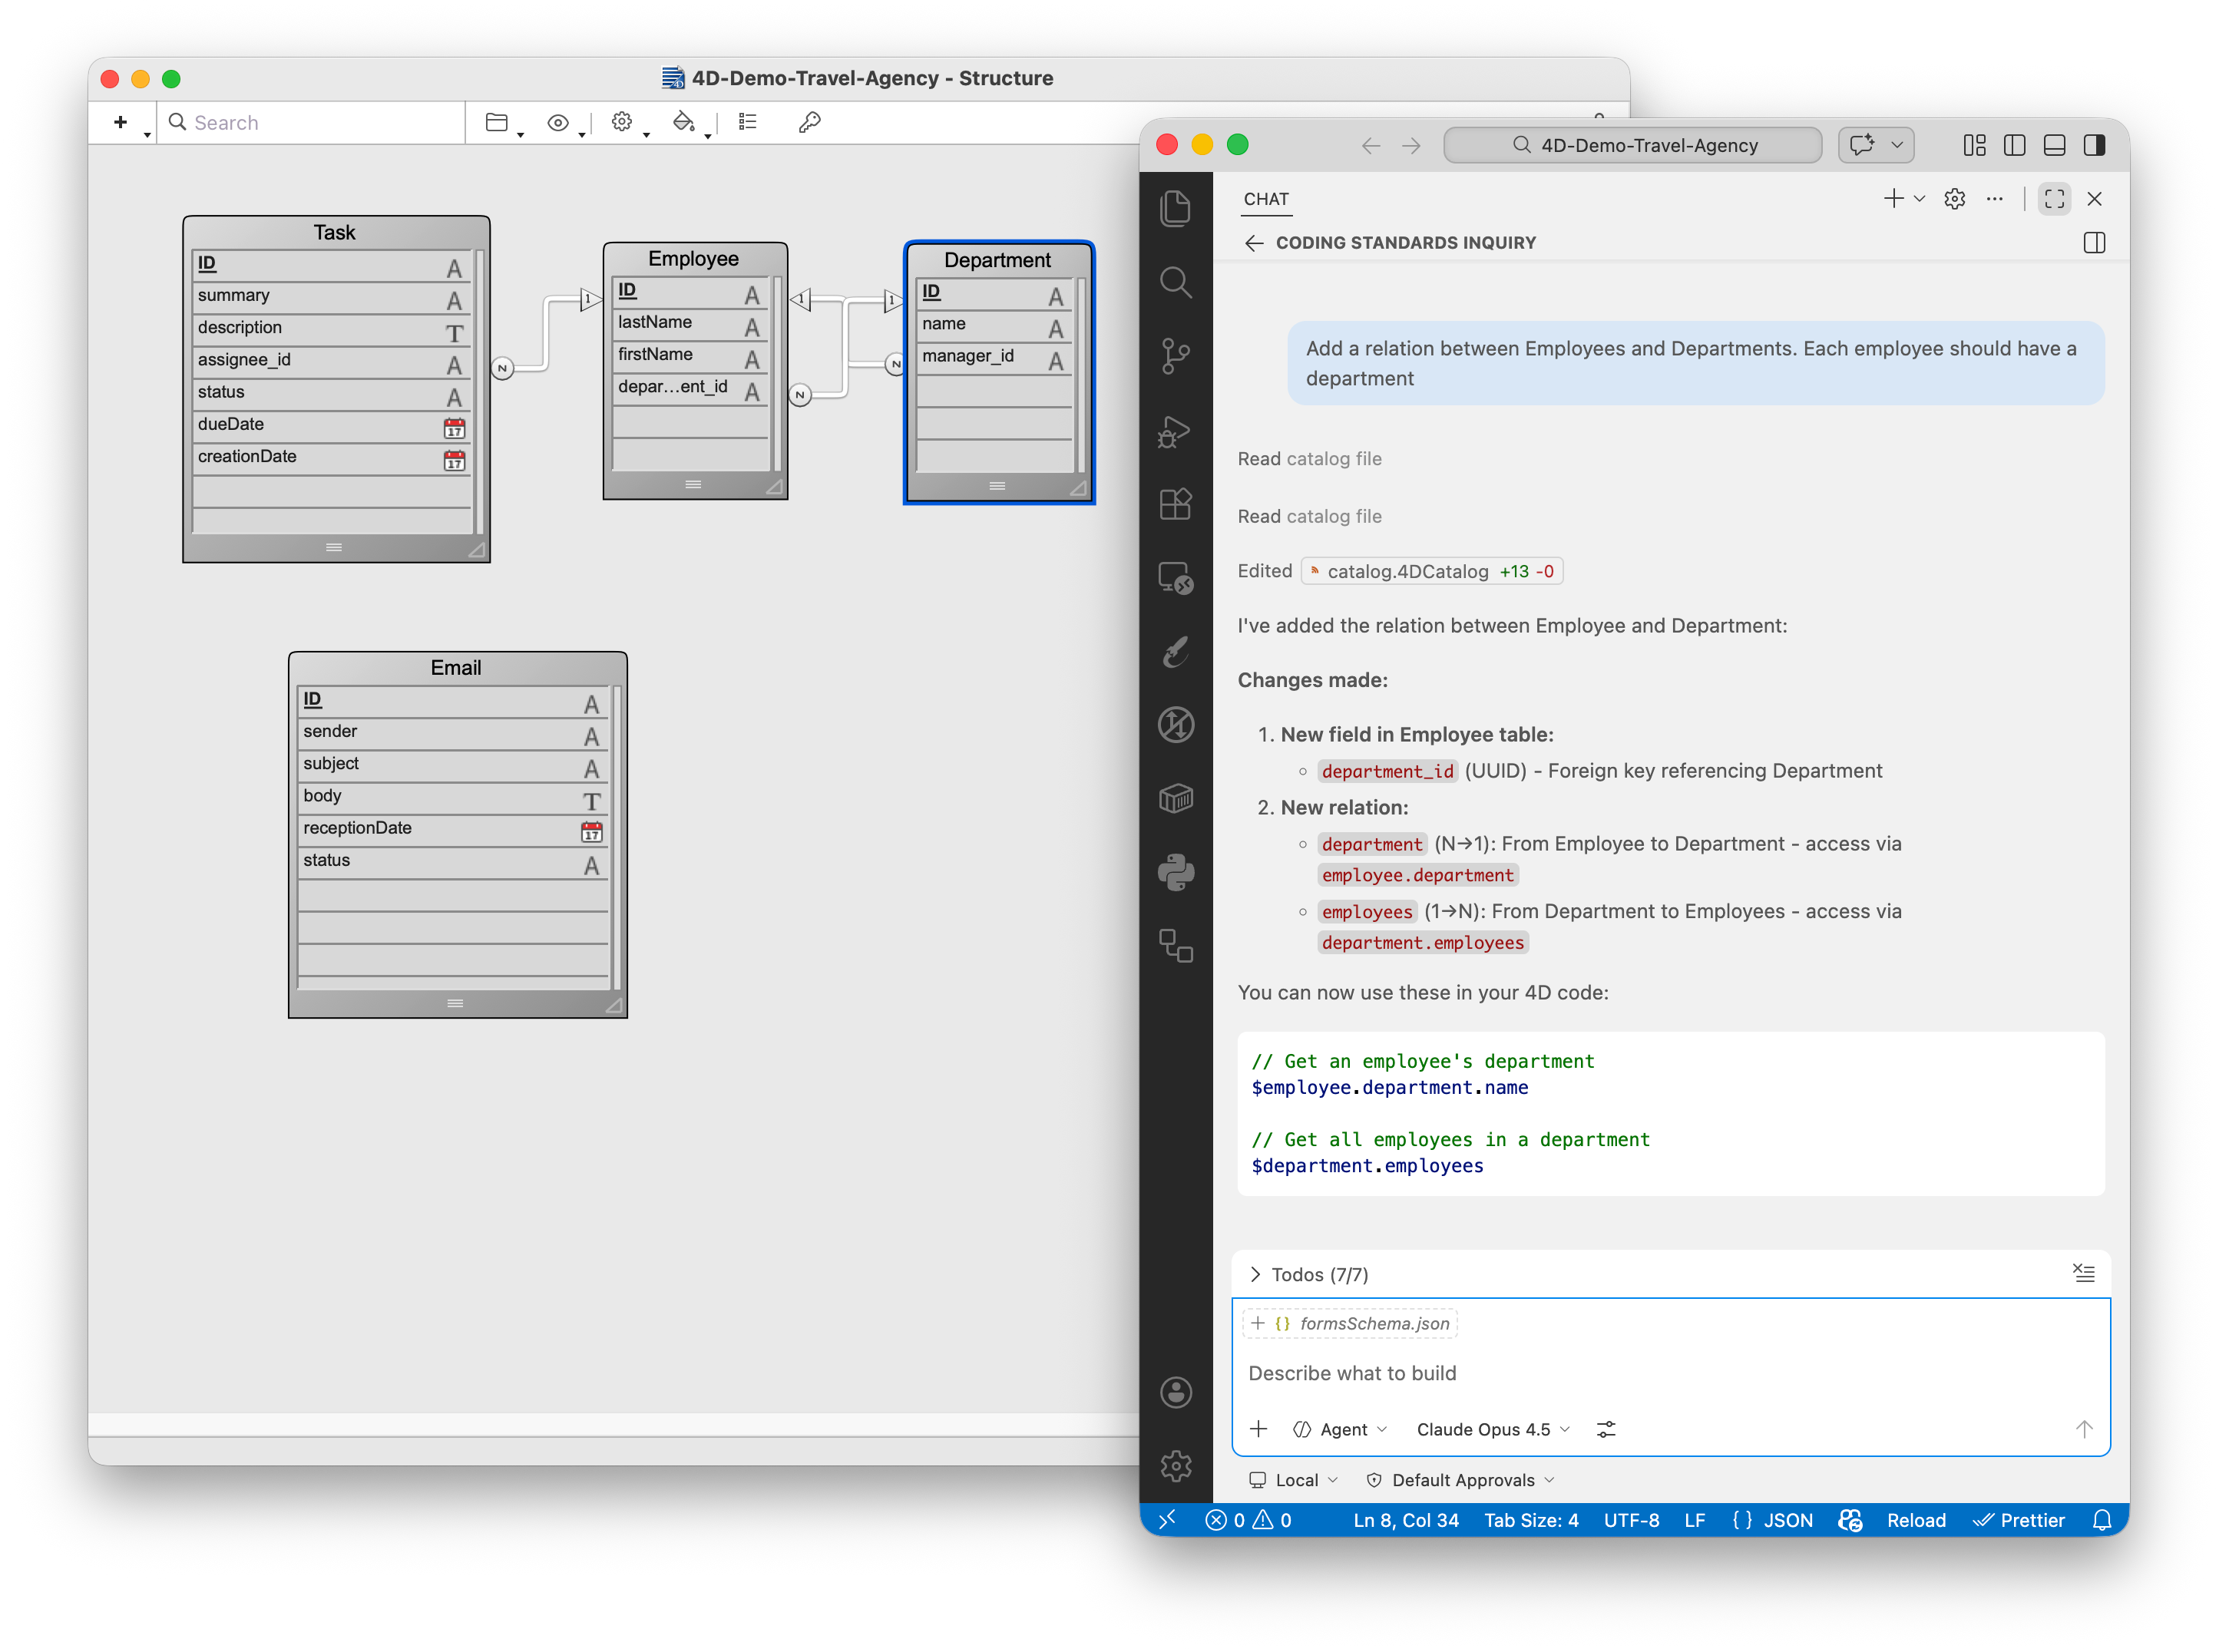
Forms are where things get really interesting. You can describe a layout in a single prompt:
You: “Create a 4D form that lists tasks. I want a list box on the left side with summary, assignee last name, department, due date, and status. On the right side, show a detail view with all that information plus the task description and department manager. Associate the form to a form class.”
Copilot generates:
The result is a working form you can open in 4D and start using. Will it be pixel-perfect on the first try? Probably not. But it gives you a solid foundation to refine through follow-up prompts or manual adjustments.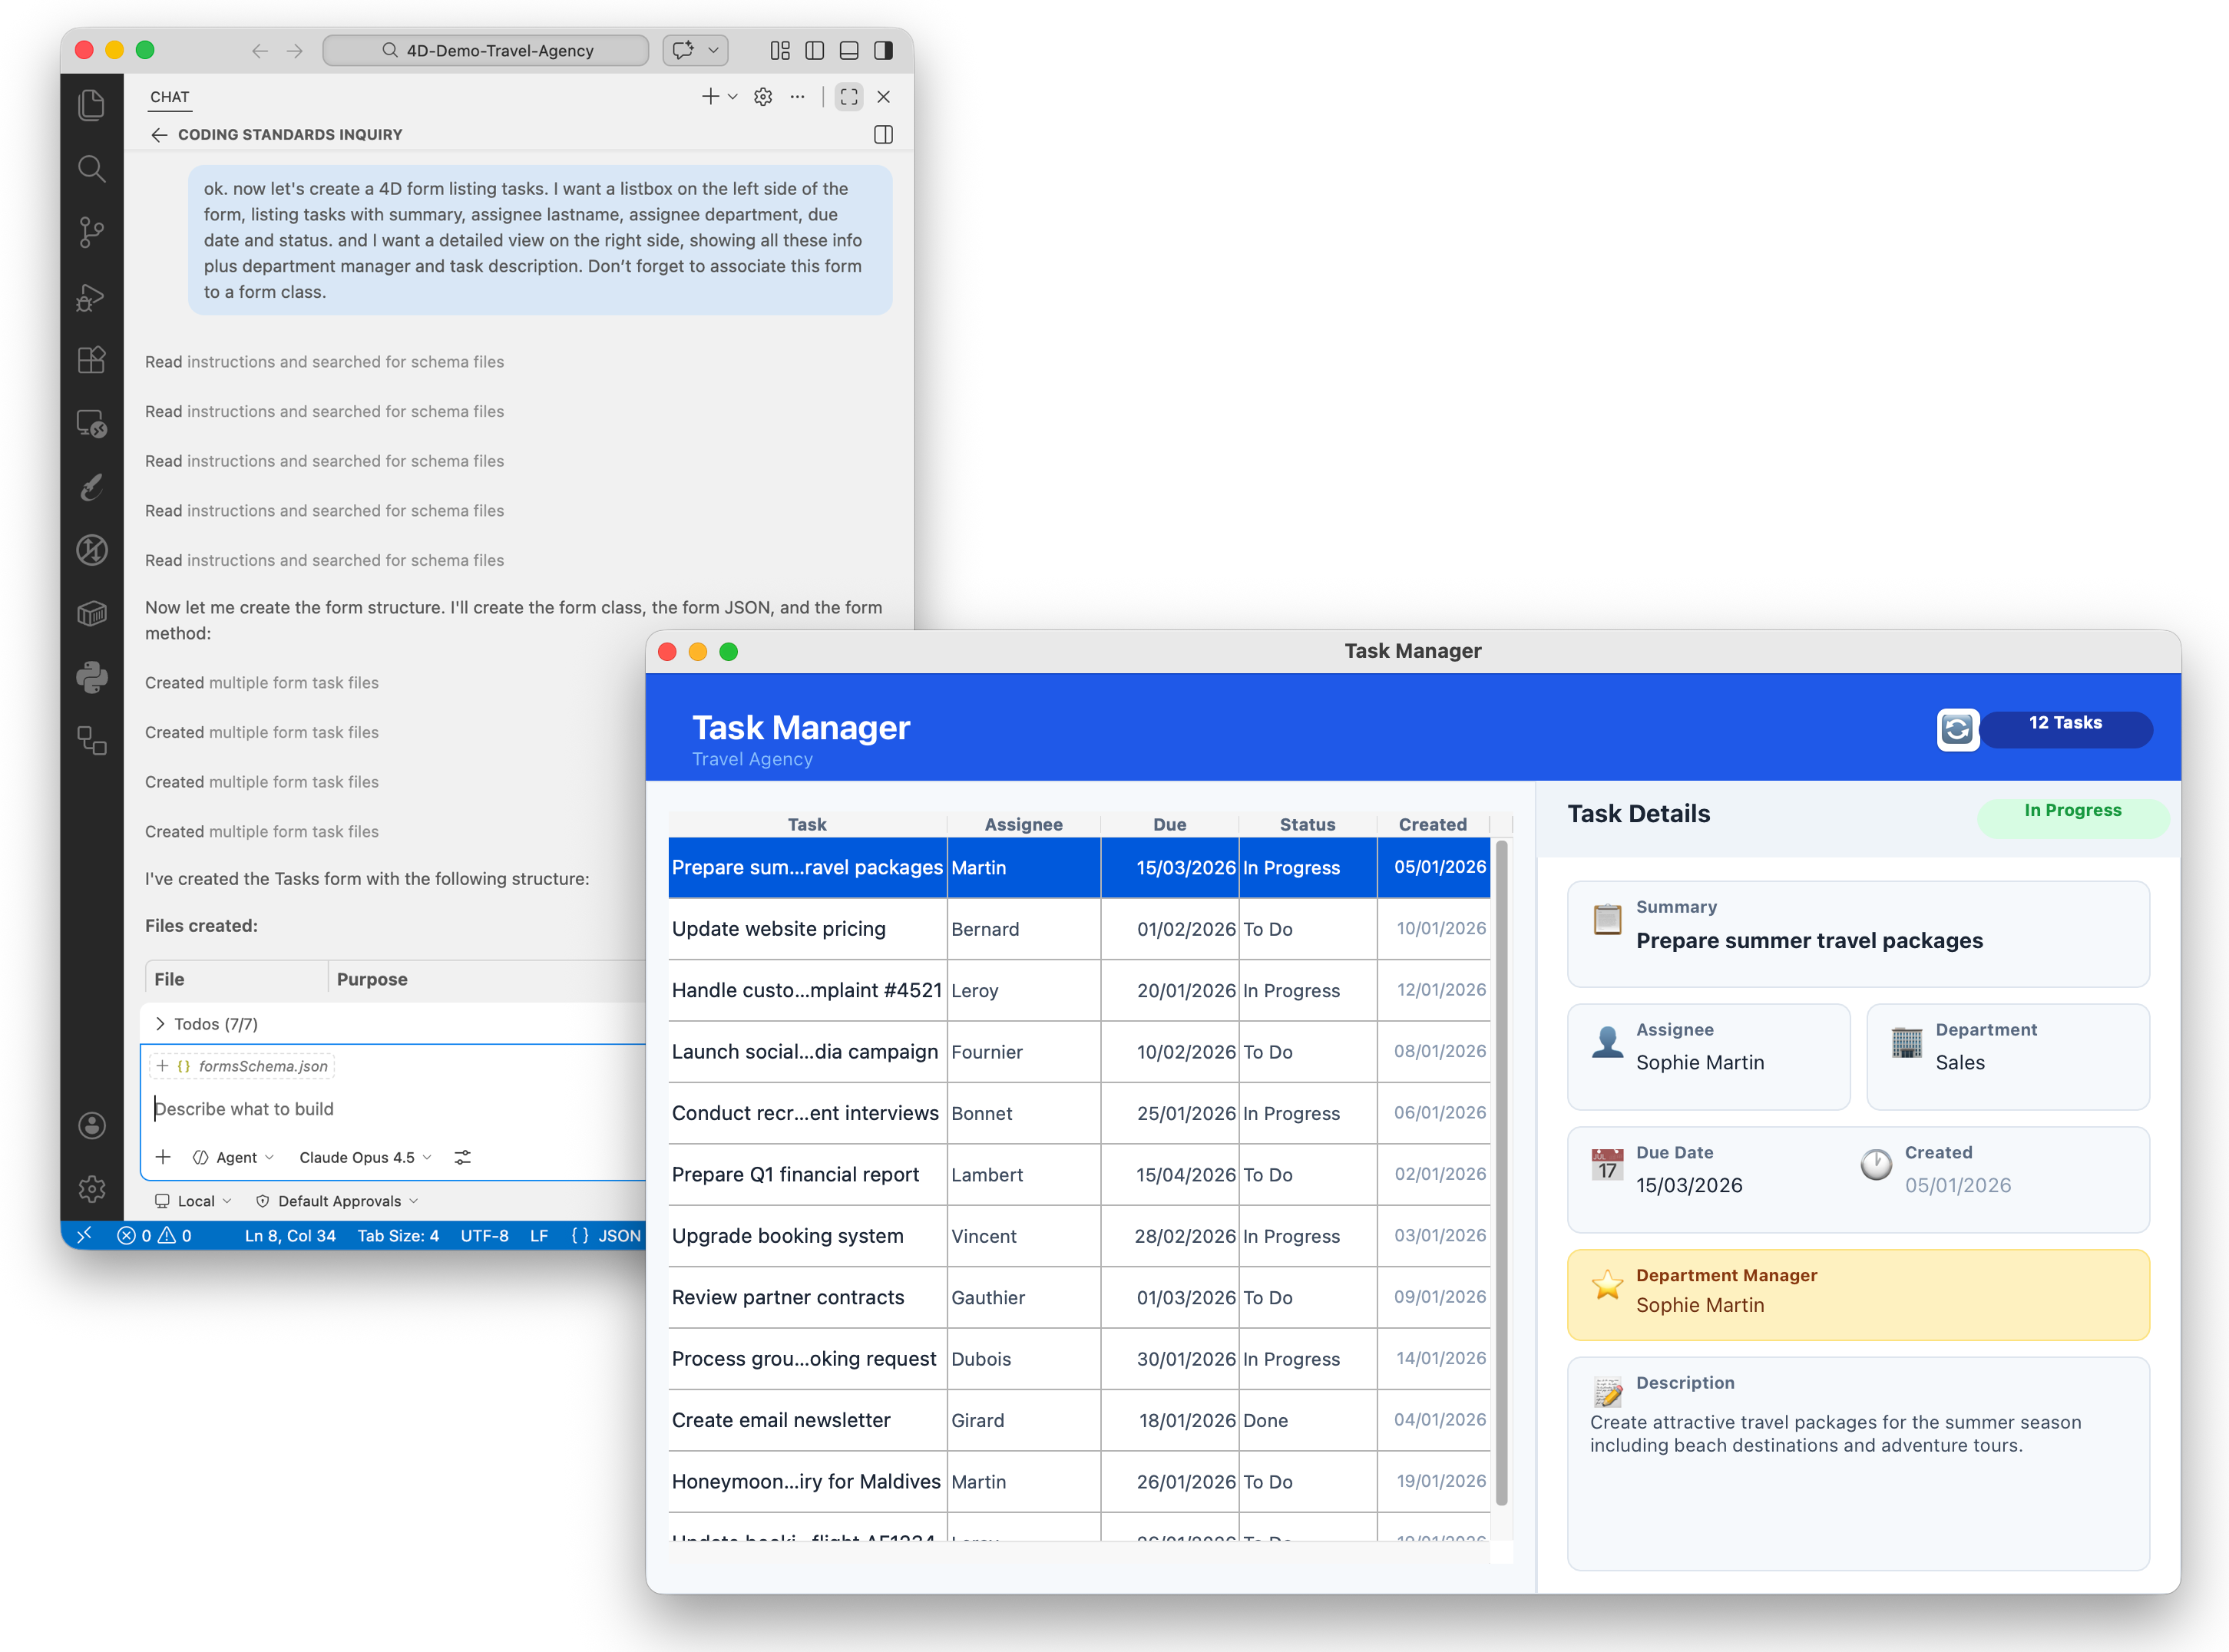
The first generated form is a working foundation, not a finished product. There are several ways to drive Copilot toward a better result:
Copilot Chat in VS Code has three modes, selectable from the agent picker at the bottom of the Chat panel:
All the examples earlier in this post were run in Agent mode, which is the right default for any task that actually modifies your project.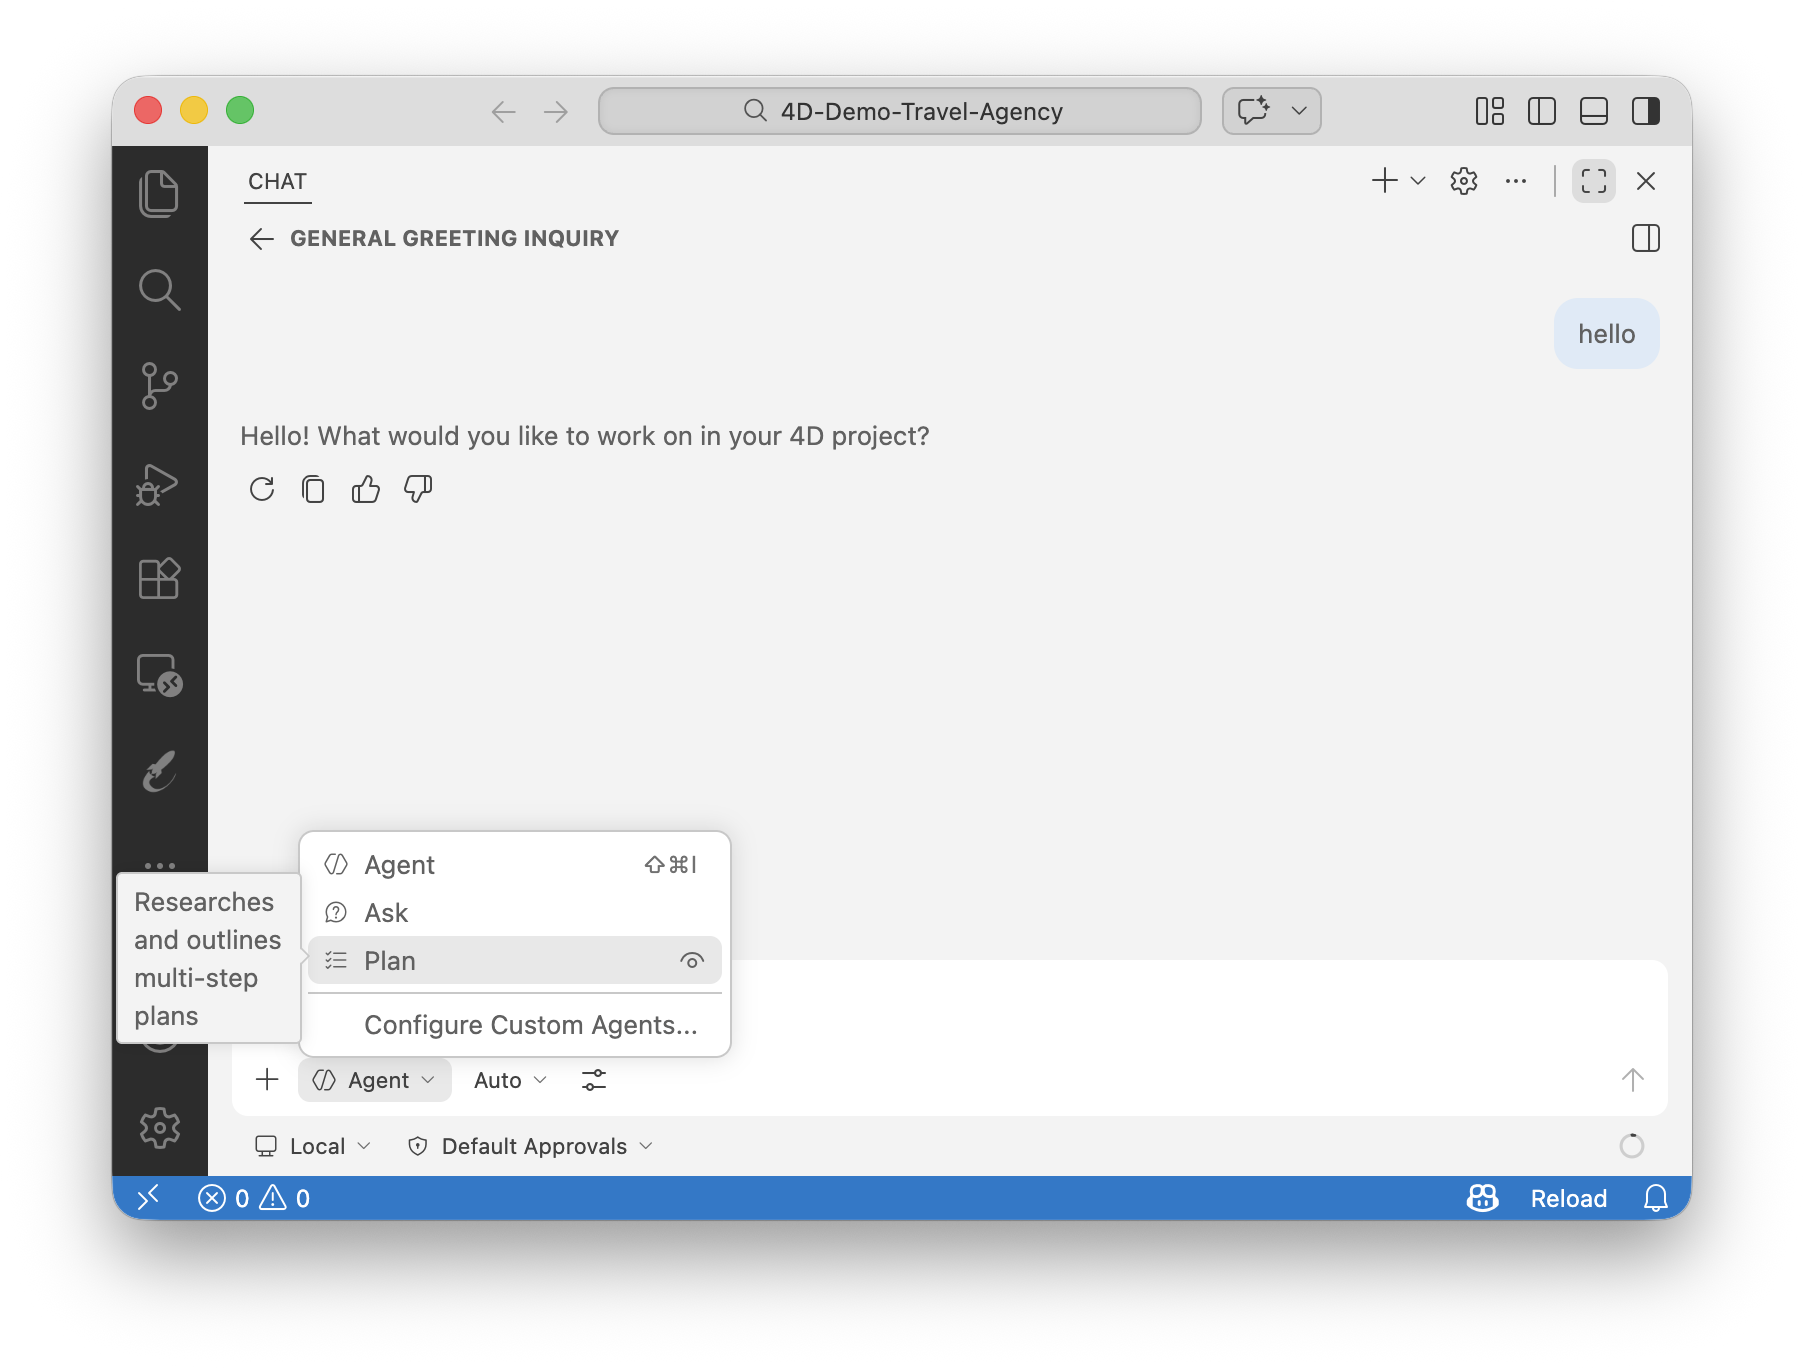
So far we’ve been working incrementally: one prompt, one change, review, repeat. For exploratory work or quick additions, that’s perfectly efficient. But for larger features that touch multiple components at once, Plan mode is worth the extra step.
Plan mode reads your codebase before producing anything. The output is a high-level summary broken into actionable steps, including any questions it has about your requirements. You iterate on the plan in plain conversation until it accurately reflects what you want, then hand it off to Agent.
This is especially valuable in 4D projects where a single feature can touch the catalog, one or more methods or classes, a form JSON, a form class, and resource files all at once. Catching a wrong assumption at the plan stage is far cheaper than untangling a multi-file execution that went in the wrong direction.
Instead of this incremental sequence:
You can write a single, well-structured prompt describing the full feature, run it through Plan to validate the approach, then let Agent execute it in one coordinated pass. This is exactly what we did in the webinar when building the email-to-task AI feature: one large prompt, covering the table, form, button, processing logic, API key config, and sample data, all at once.

Everything we’ve covered so far uses the built-in agents with shared instruction files. But VS Code now lets you go further by defining your own custom agents and skills, stored in your project under .github/agents/.
A custom agent is a Markdown file (.agent.md) that gives the AI a specific persona, restricts which tools it can use, and optionally pins it to a particular model. For example, you could create a dedicated 4D-reviewer agent that focuses exclusively on code quality, security exposure, and naming conventions for 4D projects, using read-only tools so it never modifies anything unless you explicitly ask. Or a 4D-scaffolder agent pre-loaded with your form and class templates, ready to spin up new screens on demand.
Skills (.skill.md files) are a step further: reusable, portable capabilities that can include scripts and access external resources. Where an instruction file carries passive rules, a skill carries active logic the agent can invoke. A practical 4D example: a skill that knows how to query the 4D documentation site and pull back relevant code samples directly into the chat.
The VS Code docs also describe handoffs: chained workflows where one agent passes context to the next at the click of a button. A planning agent generates a feature spec, then hands it off to an implementation agent, which hands off to a review agent. Each step is human-approved before it runs.
You can generate all of these with AI directly in the chat: type /create-agent or /create-skill and describe what you want. They can be stored at the workspace level (shared with the team via source control) or in your user profile (personal, available across all projects).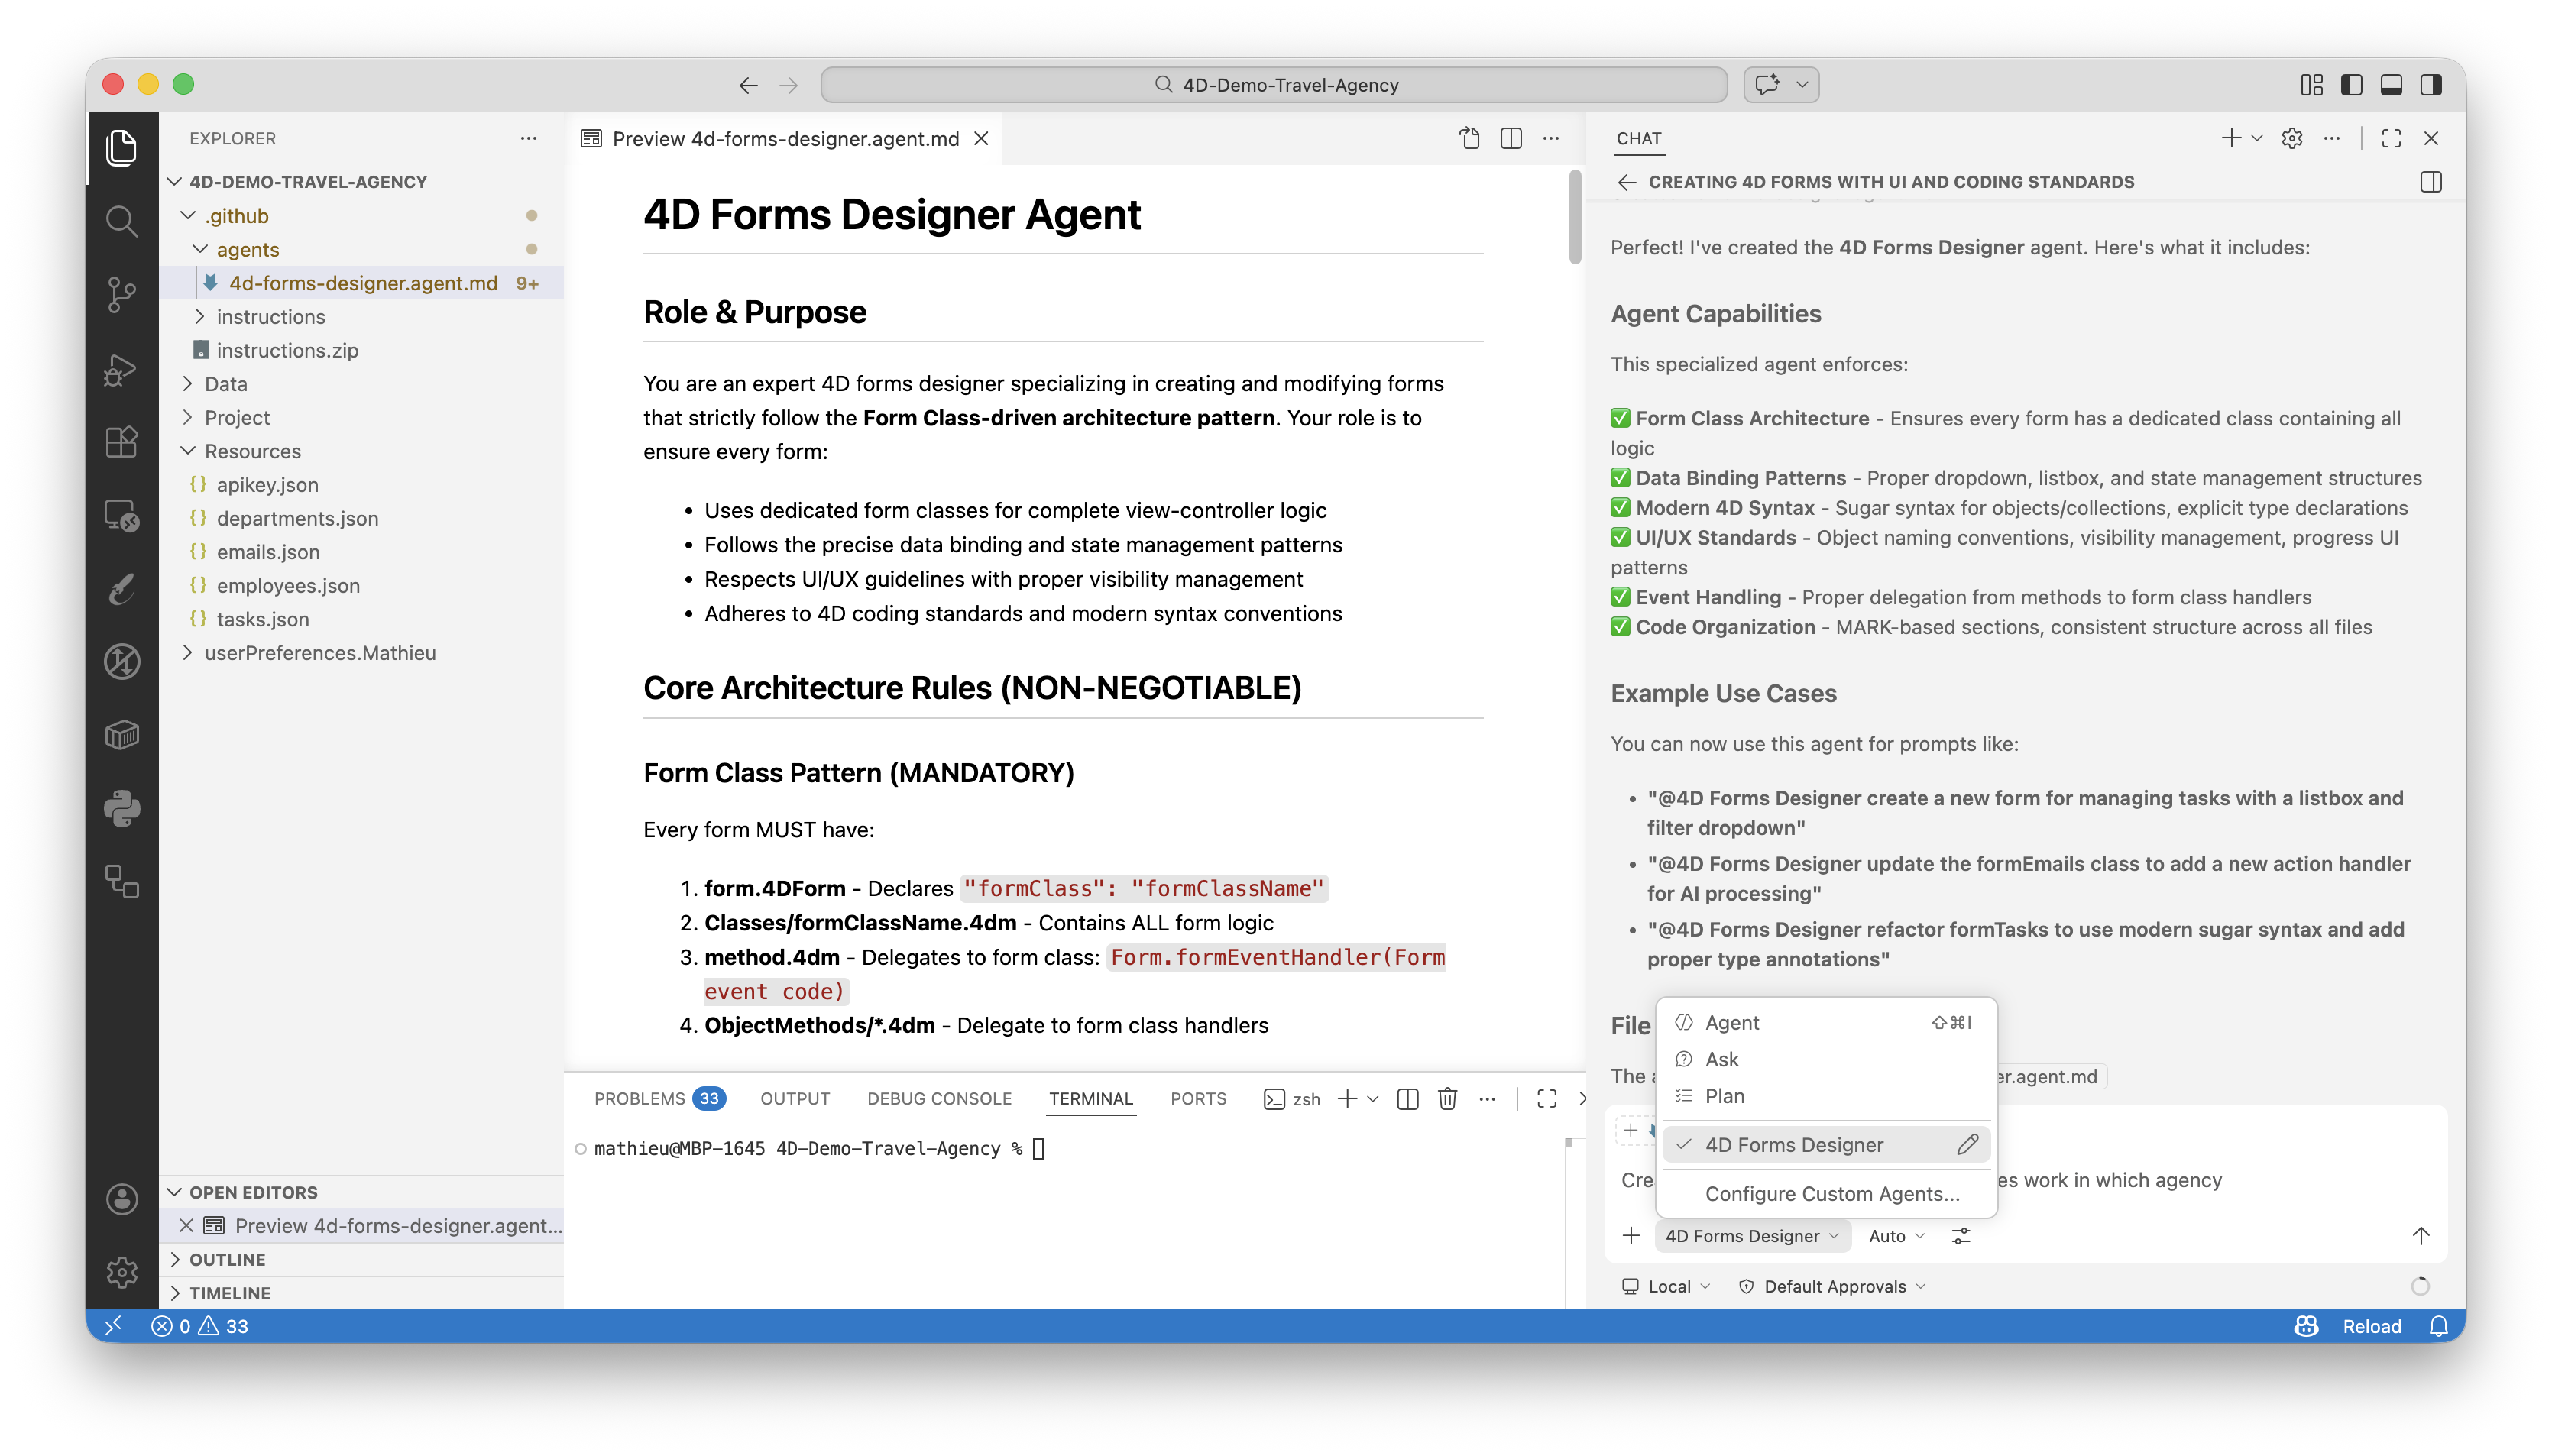
Building features is only one of the things an AI agent does well in a development workflow. Here are other situations where Copilot can carry significant load:
The workflow described in this post is available to you today. Build your first table and form through prompts, use Plan mode to tackle a full feature, refactor legacy code, generate documentation, run a security review, create a custom agent for your team. The only thing left is to try it.
Here’s everything you need to get started:
Open Agent mode, describe what you want to build, and see how far you get.
We’d love to hear about your experience. Share your results, workflows, and questions on the 4D Forum, the community is waiting!
Got a question, suggestion or just want to get in touch with the 4D bloggers? Drop us a line!
* Your privacy is very important to us. Please click here to view our Policy
Comments are not currently available for this post.