
Qodly Studio for 4D: Dynamic User Interfaces with Page States
October 15, 2024
5 min read

With 4D 20 R6, Qodly Studio for 4D introduced an exciting new feature: Page States. Perhaps you’ve already come across our previous post, but let’s explore what makes this feature so valuable for dynamic UIs.
Imagine UIs that adapt instantly to different user steps or contexts.
Here are some common use cases where Page States shine:
But what exactly is a Page State? A state is defined by how it differs from the original Qodly page, known as the Base page, allowing you to make UI elements conditionally visible or apply different styles based on user interactions. And it all starts with the Base page, the original layout of your UI.
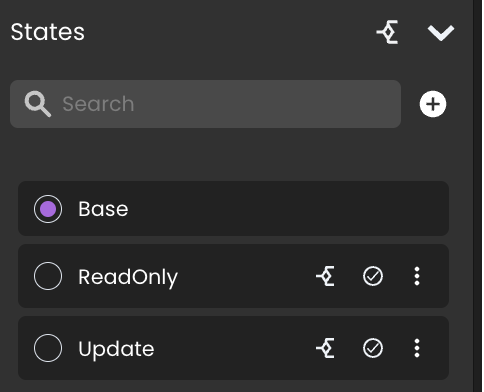
There is a new States section to handle the states.

Let’s start with a simple example.
This Qodly page has a style box with a transparent background. It is the Base page.
![]()
If you want to present the user with a variation of the Base page, create a new state, select it in the States list, and design it.
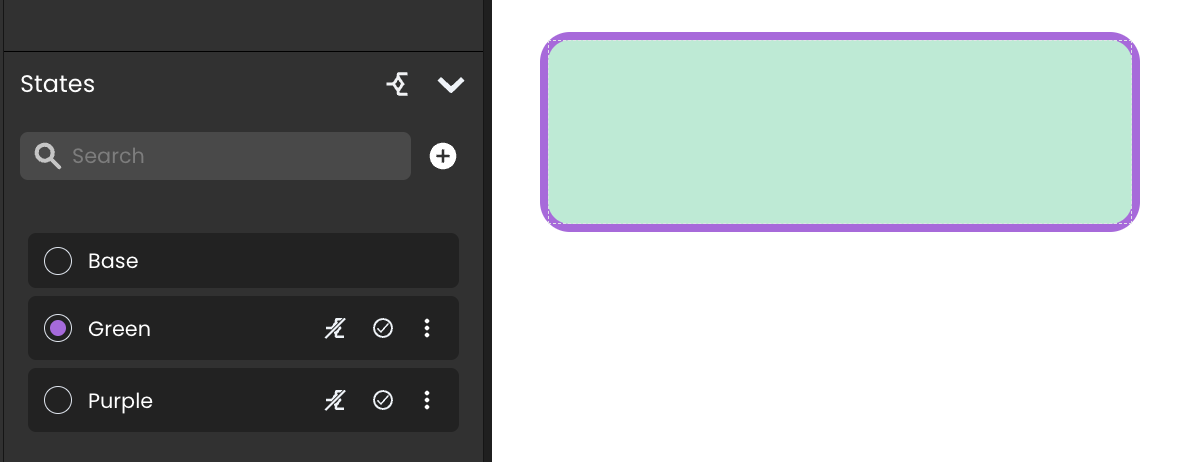
Here, a Green state has been created to have a green background instead of the transparent background of the Base page.
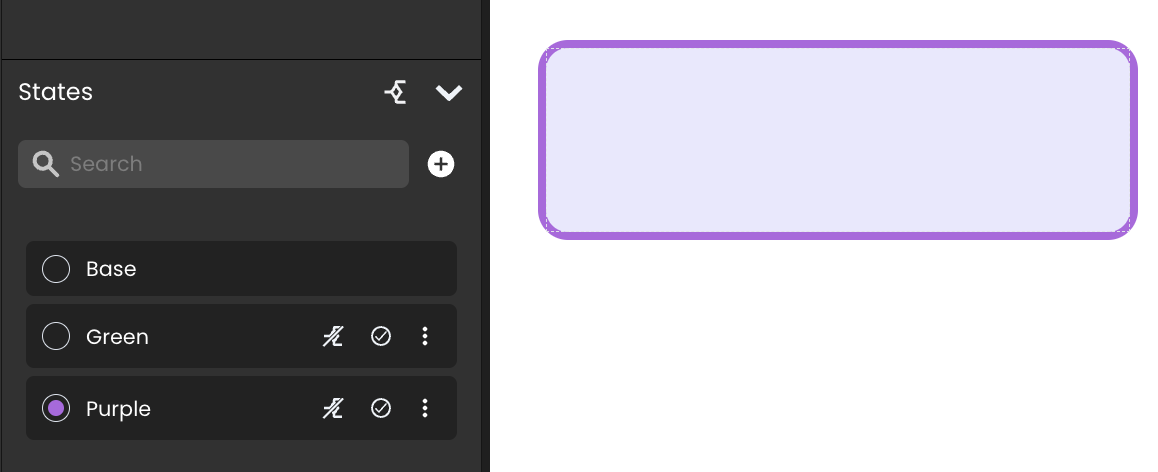
A Purple state has also been created with a purple background instead of the transparent background offered by the Base page.
The purpose is to enable or disable a state according to the situations met during the user experience.
On a Qodly page, you can create as many states as you need according to the use cases the end user will meet.
Several states can be enabled at once.
Activating or deactivating a state can be done in three ways:
Thanks to standard actions, you can enable/disable states when the user interacts with the page.
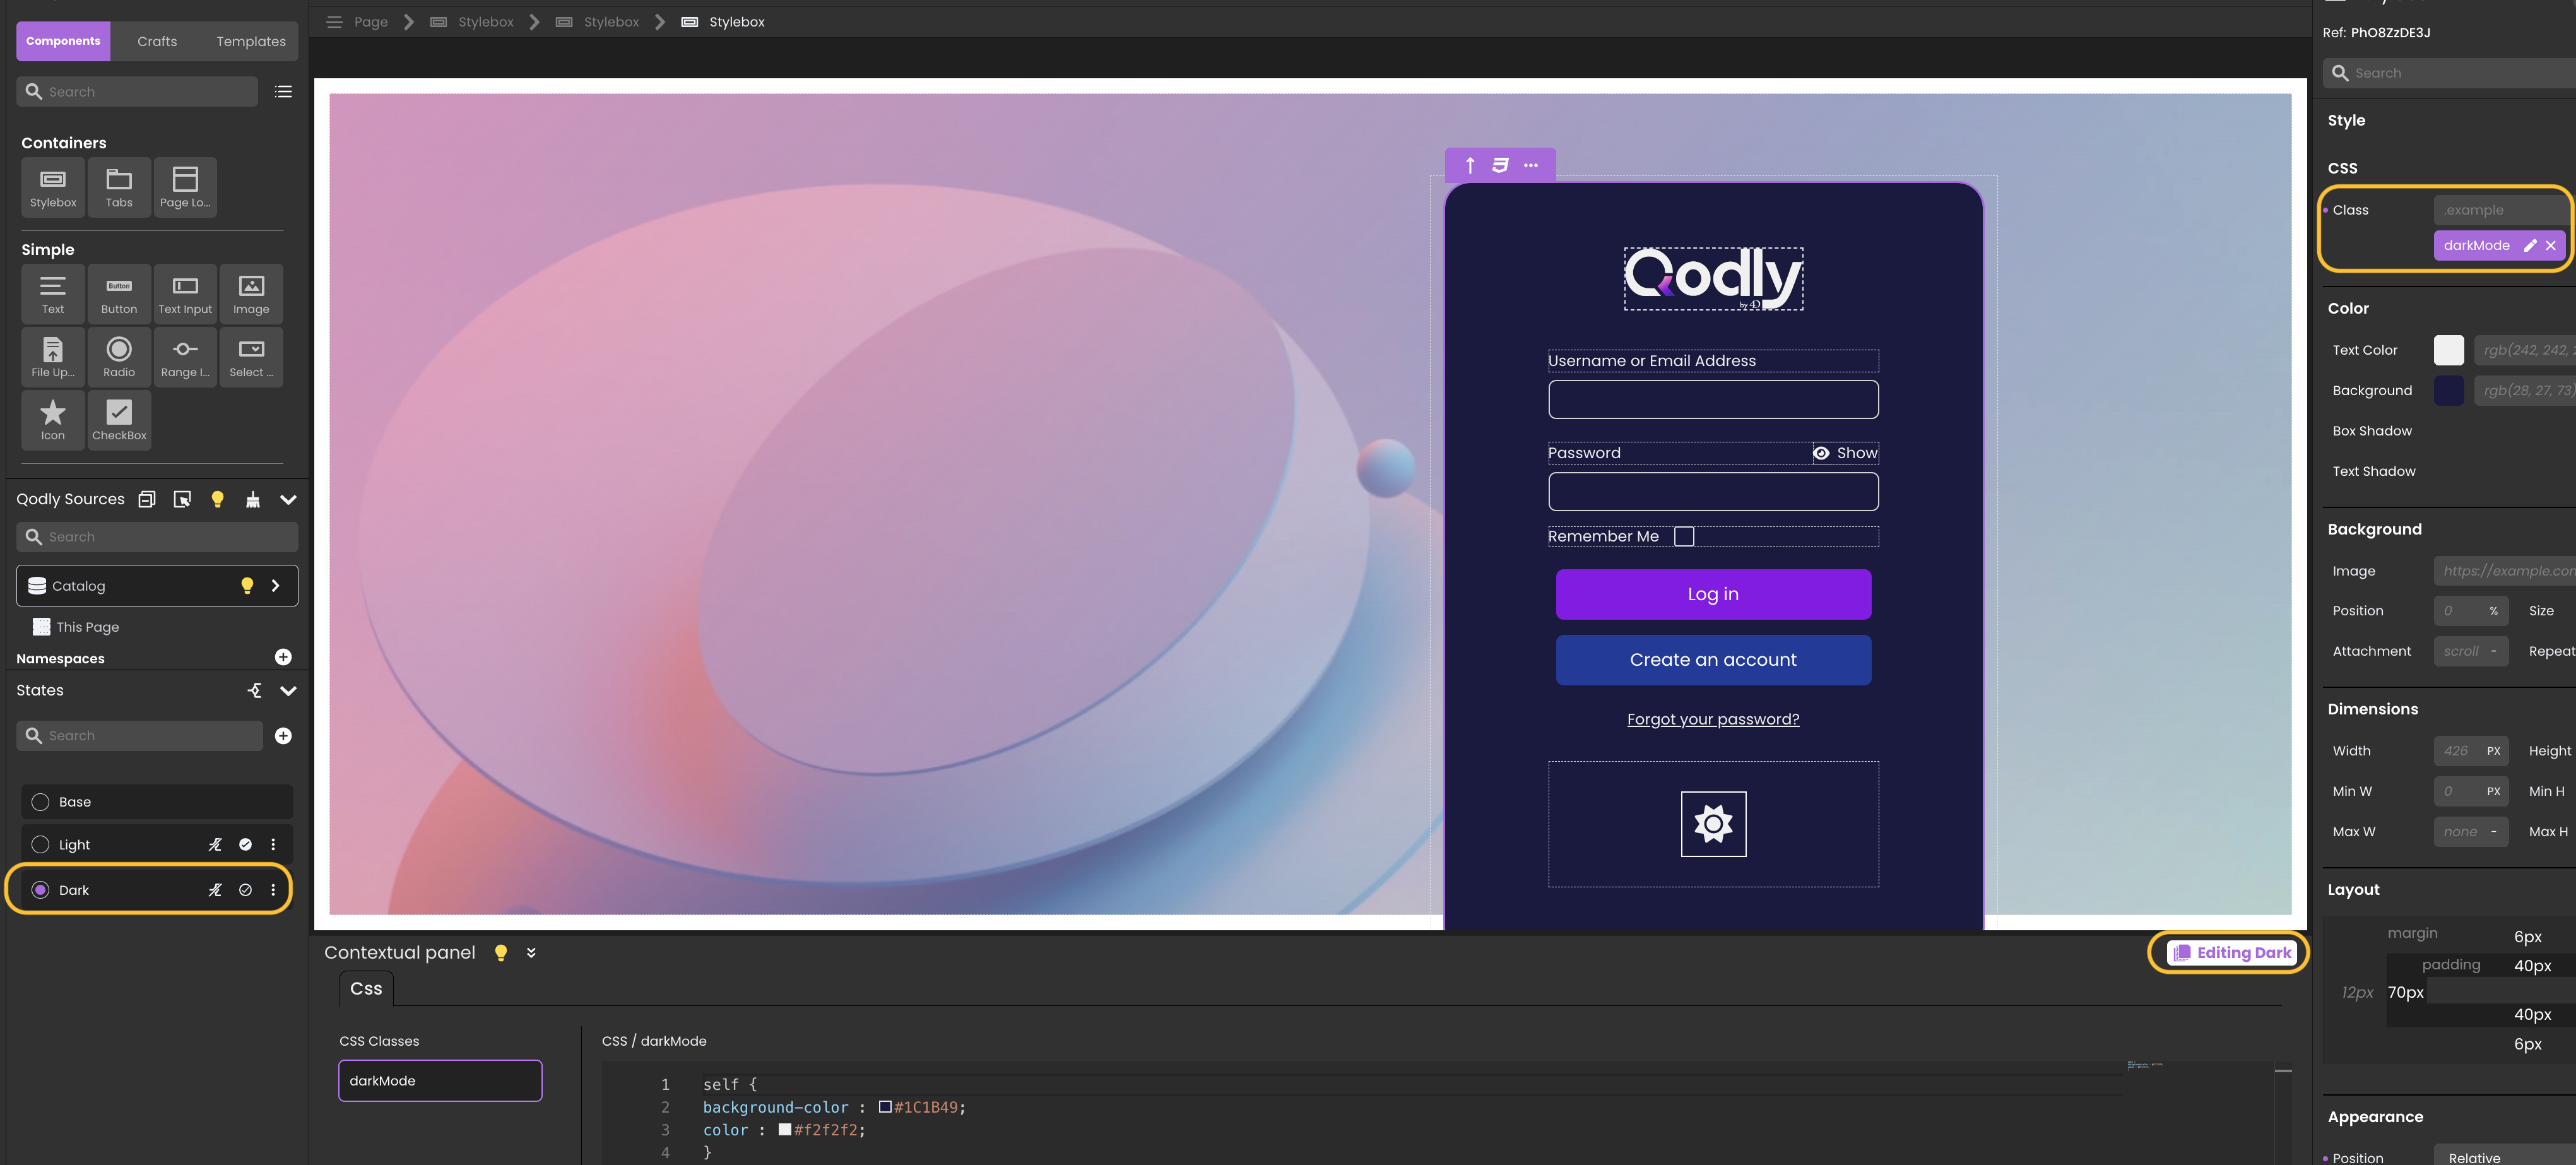
In the example below, the UI proposes light and dark modes. The Light state handles the light mode with a lightMode CSS
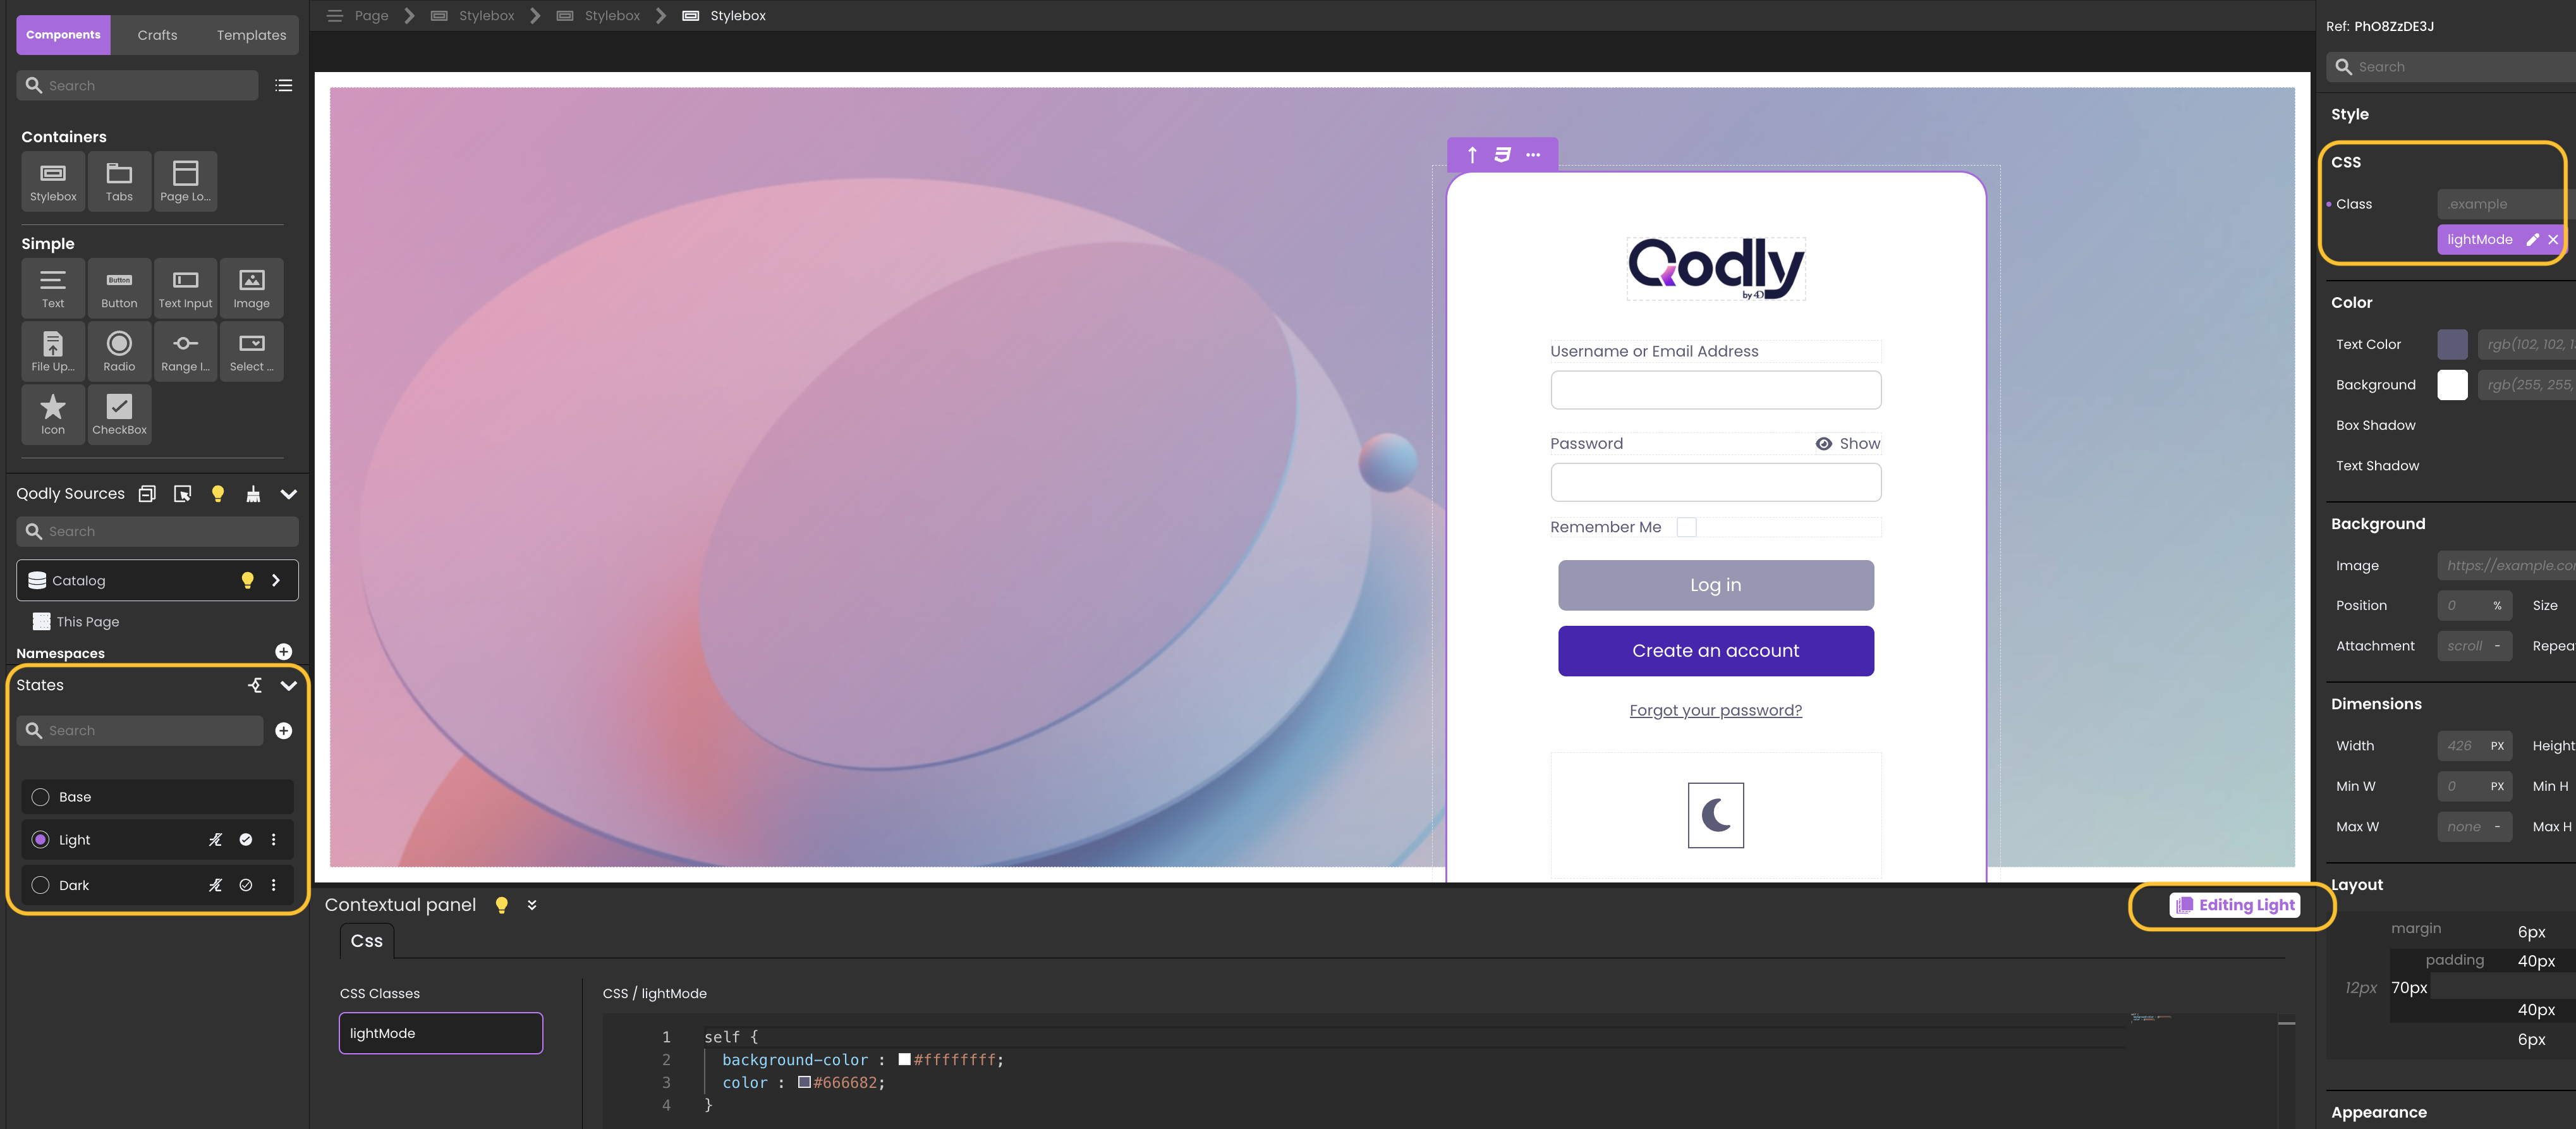
, and the Dark state handles the dark mode with a darkMode css
Below is the Base page. When the user clicks on the light icon, the Light state is enabled, and the Dark state is disabled.

(And the vice-versa action is done when the user clicks on the dark icon: the Dark state is enabled, and the Light state is disabled)
Here is the final result.

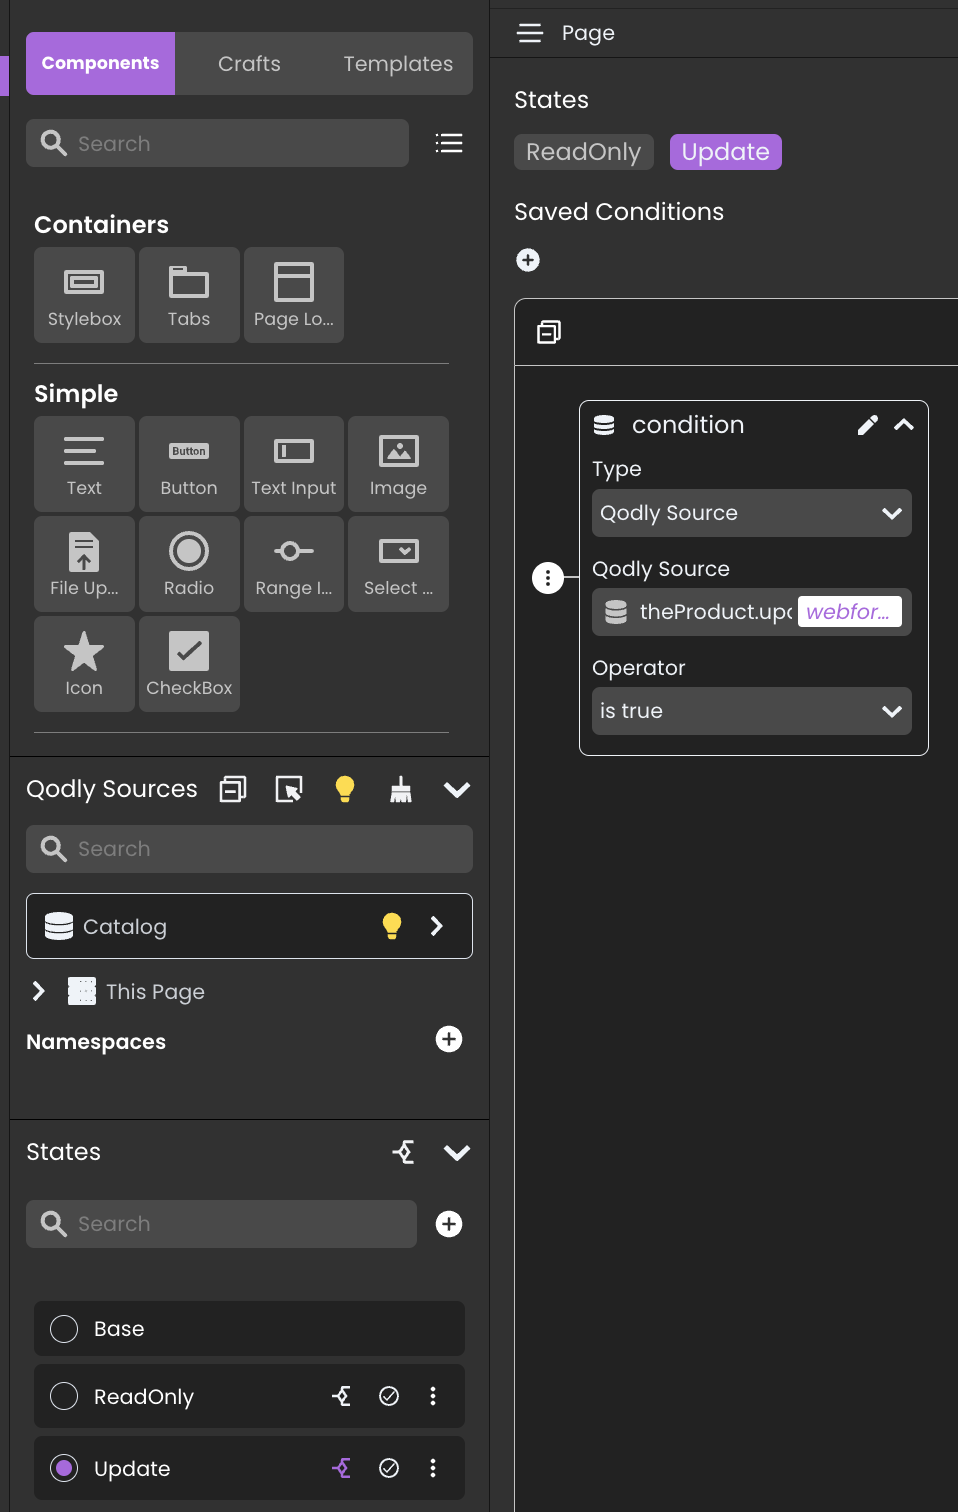
This is where the real magic happens. States can be bound to conditions, allowing your UI to respond to specific criteria like user privileges or data values. The state is enabled or disabled dynamically according to evaluating the condition as TRUE or FALSE.
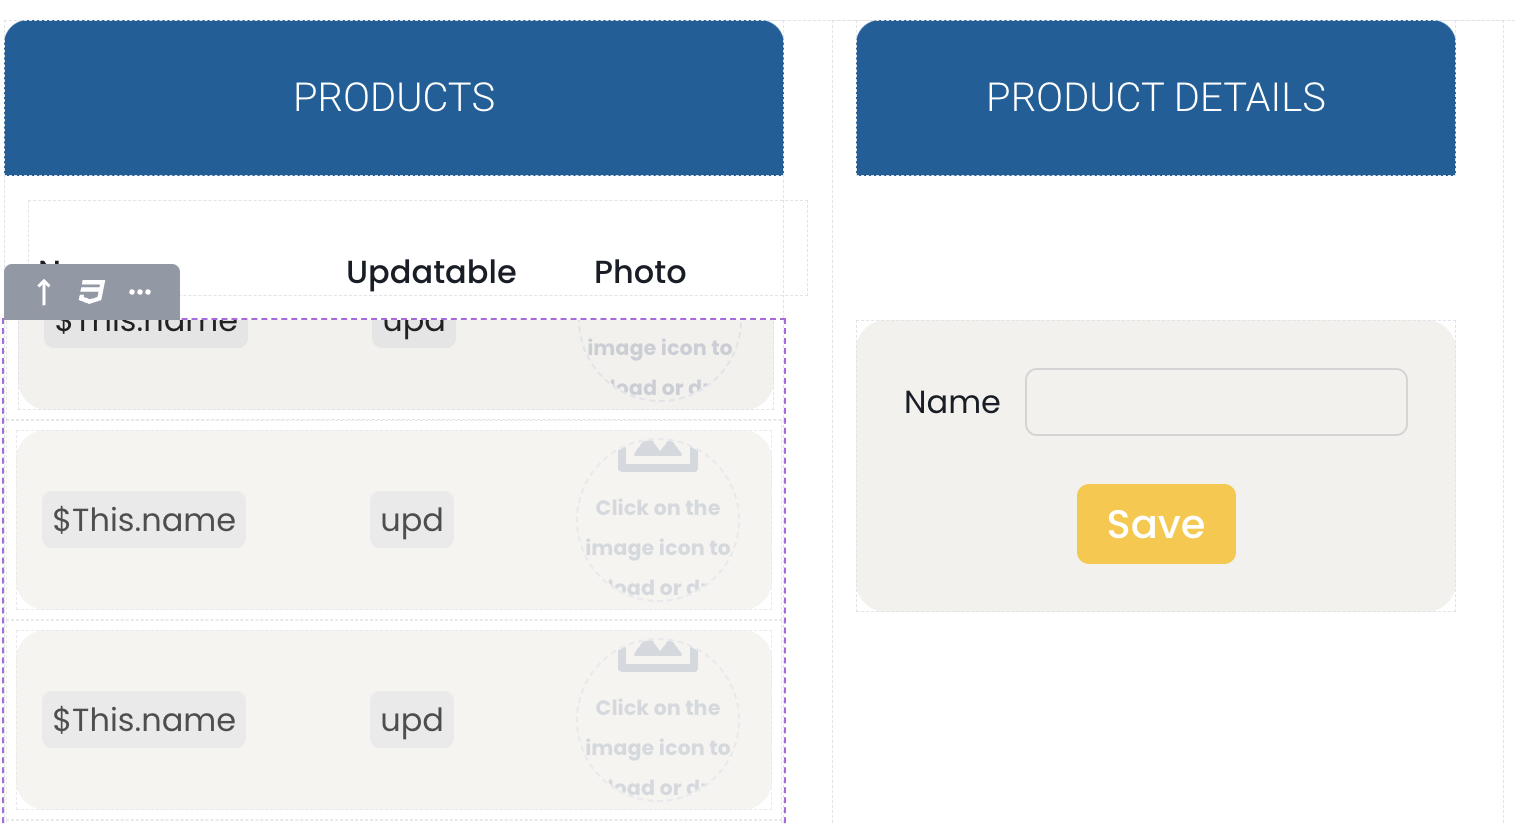
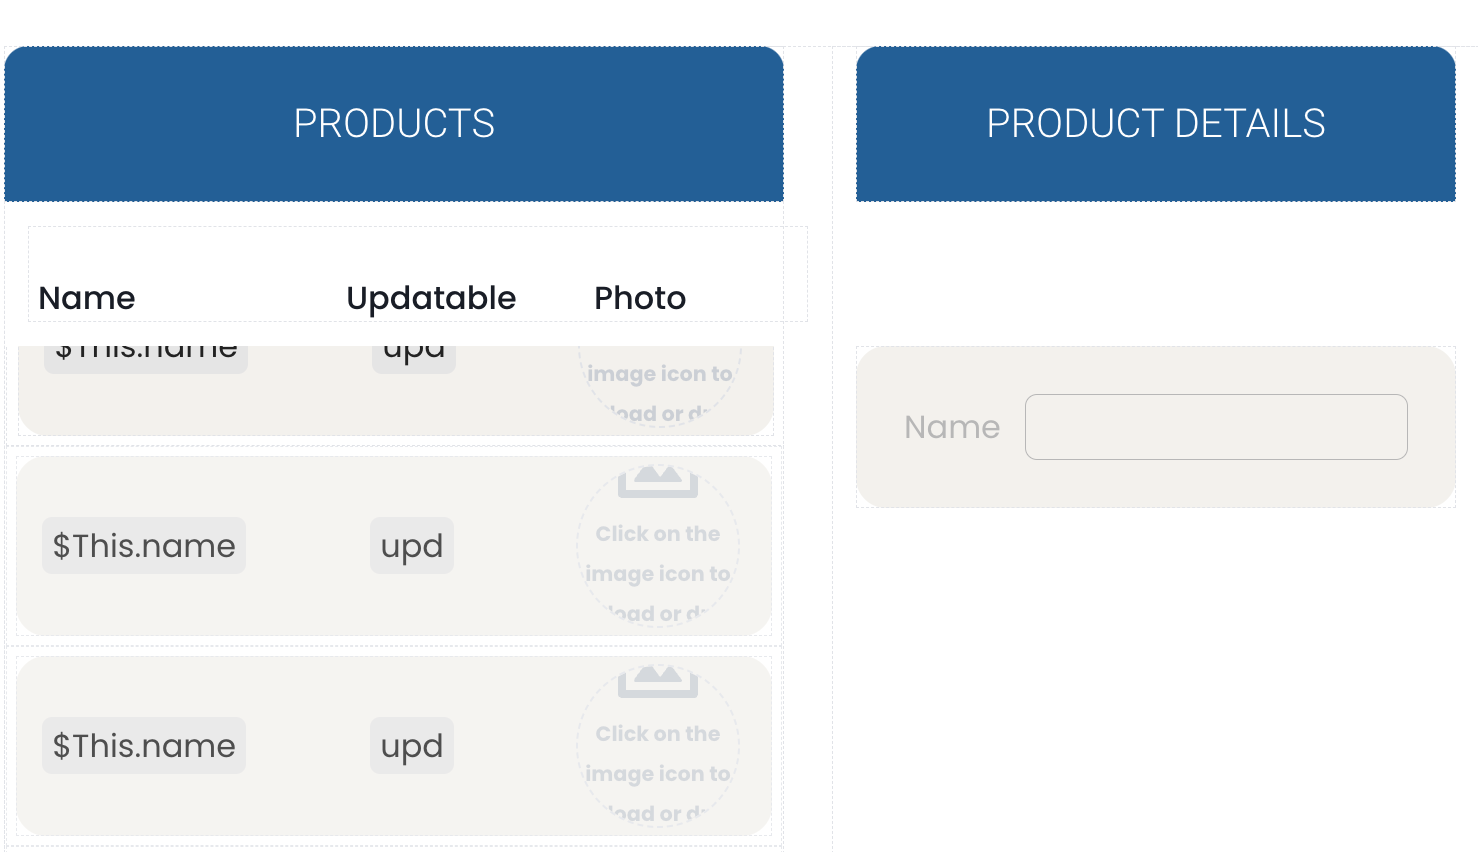
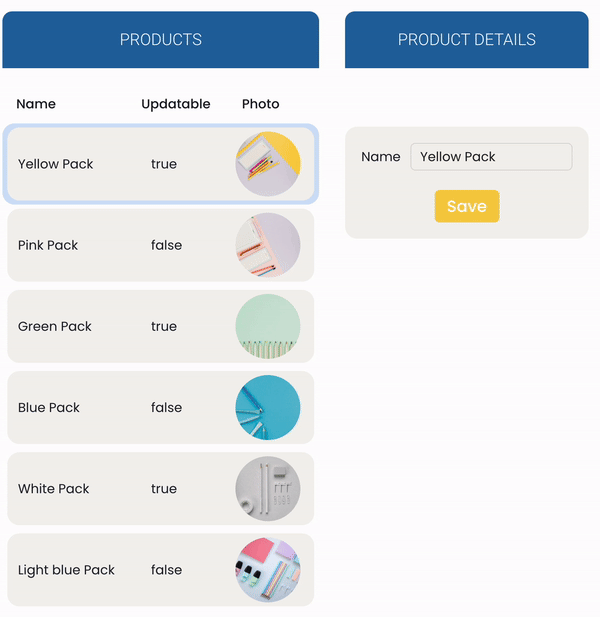
In this example, the UI shows a list of products and a Product details section that eventually updates the selected product name.
Two states have been created:
It’s easy to guess: the Update state is needed when the user can update the selected product, whereas the ReadOnly state is needed when the user can only view the product data.
Below is the Update state. In the Product details section, the Name field is enabled, and there is a Save button.
And here is the ReadOnly state. In the Product details section, there is only a disabled Name field.
The ReadOnly and Update states are each bound to a condition. The ability to update a product relies on the selected product updatable attribute.
The ReadOnly state is enabled if the condition theProduct.updatable = false. The Update state is enabled if the condition theProduct.updatable = true.

 Here is the final result.
Thanks to the powerful and user-friendly conditions editor, you can create nested conditions to handle the most complex business logic!
These conditions can be based on criteria like Qodly source values, whether the session has or does not have some privileges, and more. Check the documentation to learn more.
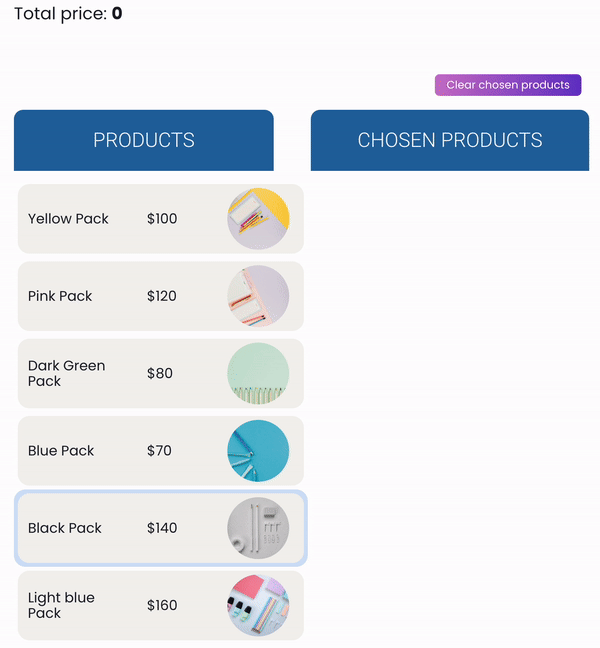
The last thing to be aware of is that enabling/disabling states from back-end code can be helpful when some business rules can be evaluated only on the back-end.
In the attached demo, you’ll see an example of this. The user selects products. Once the total amount of the selected products is higher than or equal to $300, a state preventing any selection of products is enabled.
Thanks to the Web Form.enableState() and Web Form.disableState() functions, this is done.
Here is the code below. The LimitReached state disables any user selection.
	If ($tempSelection.sum("price")>=300)
		Web Form.enableState("LimitReached")
		Web Form.disableState("Initial")
	End if
Here is the final result.
Download the attached Play In Qodly Studio demo to learn how to use the page states and how to offer a dynamic interface to your end users.
Got a question, suggestion or just want to get in touch with the 4D bloggers? Drop us a line!
* Your privacy is very important to us. Please click here to view our Policy
Comments are not currently available for this post.