
Integrating User Authentication in Your Qodly Applications
March 17, 2025
4 min read

In this week’s blog, we will focus on the crucial topic of authentication. To illustrate our discussion, we will use the example of an application designed for writing annual performance reviews for employees. This application enables users to securely access their accounts by authenticating with their email and password.
Performance Review Application
Authentication is a cornerstone of any web application, ensuring that only authorized users can access sensitive information or perform specific actions. In our example, the login process is simple yet effective, demonstrating how 4D Qodly Pro handles authentication securely and efficiently.
The login form is located on the “login” page and consists of:

In Qodly Studio, other prebuilt form templates for login functionality are available in the dedicated templates section. These templates can be customized to suit your application’s specific requirements.
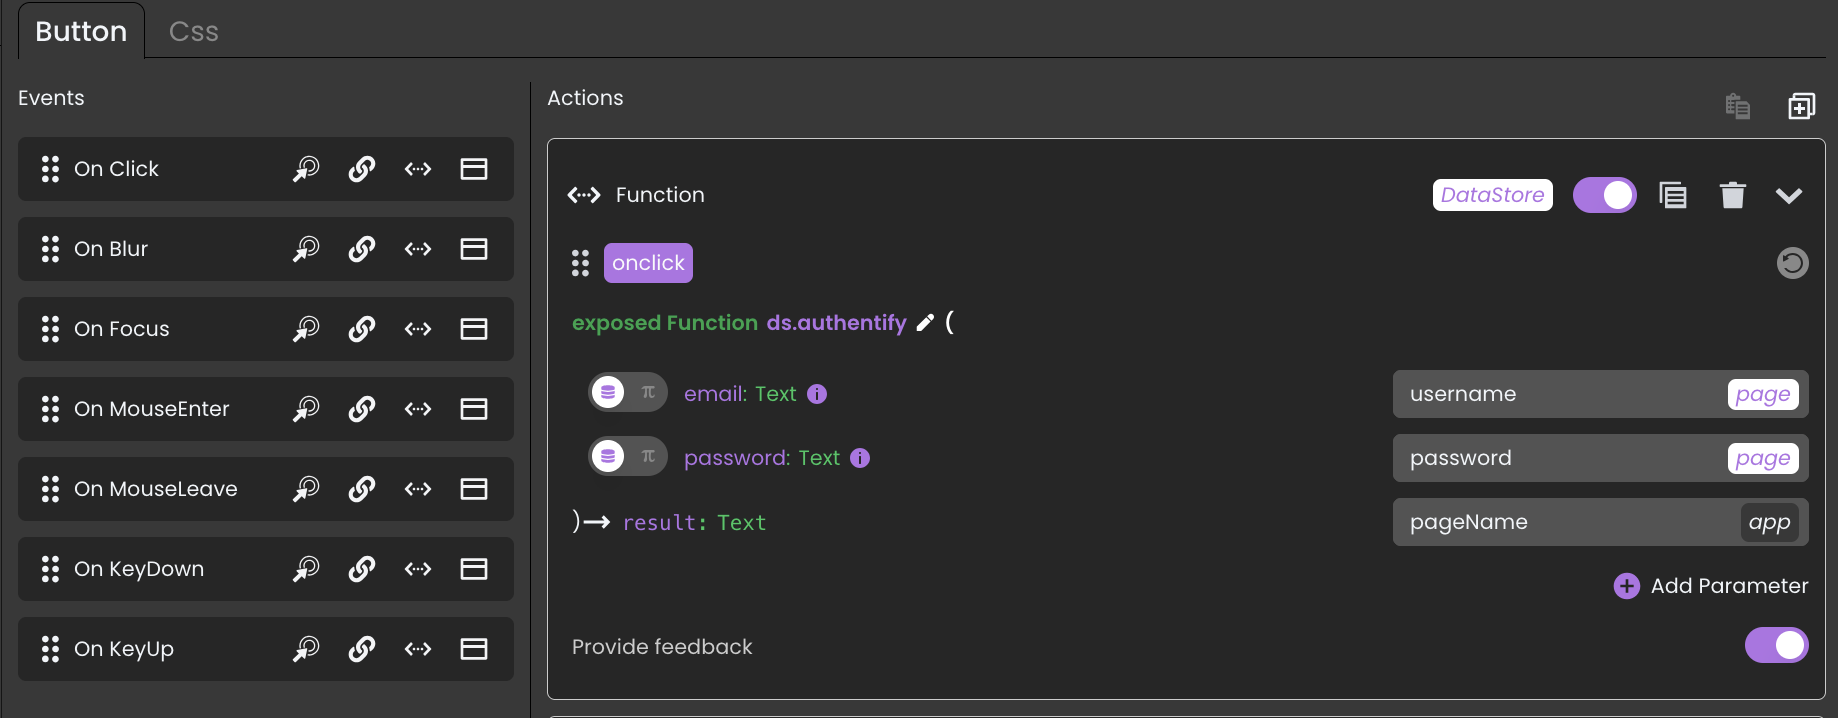
When the user clicks on the “Sign in” button, the function “ds.authentify()” is called with the email and password as parameters.
The user’s information, such as email and password, is stored in the database within the “Employee” table. In the “authentify()” function, a simple database query is performed to verify the information.
Here is a code to illustrate this process:
exposed Function authentify($email : Text; $password : Text) : Text

 $employee:=This.Employee.query("Email = :1"; $email).first()

 If ($employee#Null)

  If (Verify password hash($password; $employee.Password))

   Session.setPrivileges("user")

   Web Form.setMessage("Authentication successful")

  Else

   Web Form.setError("Authentication failed")

  End if

 Else

  Web Form.setError("Authentication failed")

 End if
Before authenticating a user, it’s vital to restrict access to sensitive data and functions. This security is ensured by privilege management.
First, we have a privilege labeled “none,” which possesses all rights to the data source (ds), ensuring comprehensive access to the database. Notably, this privilege is not assigned to any user, thus maintaining a secure environment. When rights are granted to one privilege, they are automatically revoked from all others, effectively securing the system.

Then, we added a privilege called “authentify”. The permission “promote” is assigned to the function “ds.authentify()”. This means that whenever this function is called, the “authentify” privilege is automatically applied.
Then, we ensure that the required permissions for authentication are added to the relevant dataclass or functions in use. For our example, we assign “Read” and “Execute” permissions to the “Employee” dataclass.

Finally, we activate the “Force login” option. This option allows you to control the number of opened web sessions that require 4D Client licenses. You can also logout the user at any moment to decrement the number of retained licenses.
This multi-layered privilege system helps prevent unauthorized access and ensures secure operation of the application.
To learn more, check out our blog post: Force Login Becomes Default for all REST Auth.
To enhance user experience and security, it’s important to provide a logout option. In our example:

This allows users to securely end their session, clearing any active privileges and protecting sensitive data.
Authentication and privilege management are fundamental to building secure web applications. To further explore the capabilities of authentication and privilege management, consult the following resources:
We encourage you to try implementing these concepts in your own applications. Have questions or insights? Join the discussion in the forum or share your feedback in the comments below. Stay tuned for the next article in our series!
Got a question, suggestion or just want to get in touch with the 4D bloggers? Drop us a line!
* Your privacy is very important to us. Please click here to view our Policy
Comments are not currently available for this post.