
4D View Pro: Manually Adjust the Print Area Using Page Breaks
July 27, 2021
1 min read
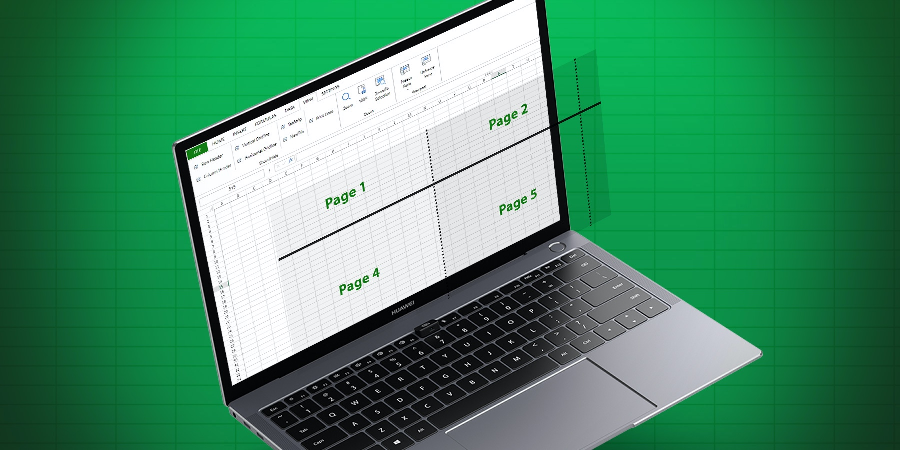
When printing, page break location is set by default, but you can adjust the print area by defining your own page breaks.
Starting with 4D v19 R2, to help your customers choose where they want to place their page breaks, 4D View Pro lets you add and remove page breaks manually, and also display the print preview lines.
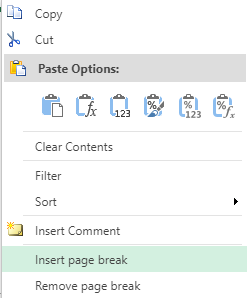
There are two ways to set page breaks in 4D View Pro:
The print lines indicate where the pages break during printing:
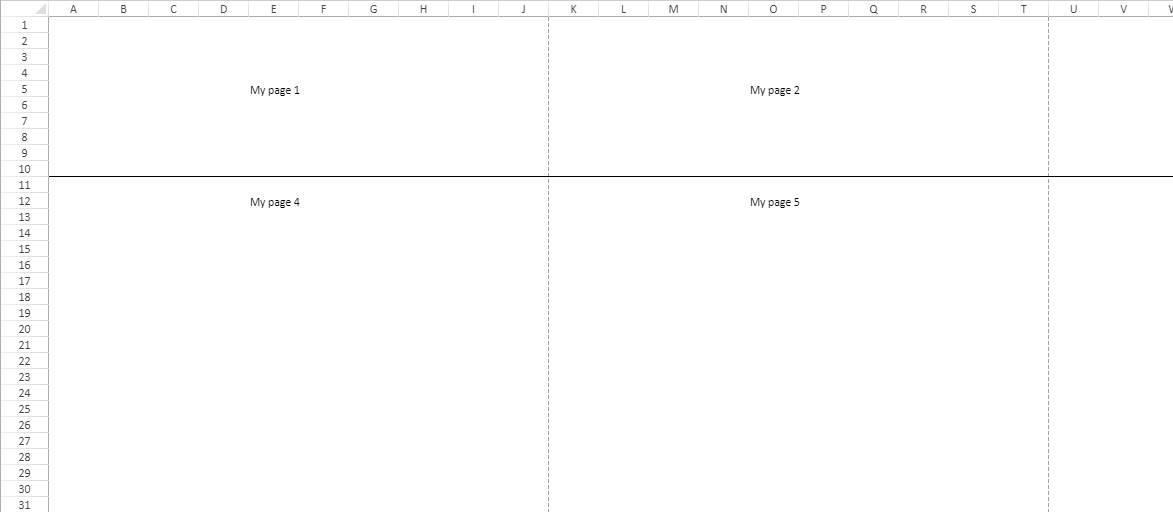
The dotted lines are the page breaks calculated by SpreadJS, and the solid ones are the ones added by the user.
There are three ways to display or hide the print lines:

More new features on document printing will be coming soon. Stay tuned!
Got a question, suggestion or just want to get in touch with the 4D bloggers? Drop us a line!
* Your privacy is very important to us. Please click here to view our Policy
Comments are not currently available for this post.